Tender Alerts
Tender Alerts automatically notify you via email when new tenders match your search criteria. Instead of checking the platform daily, set up alerts and receive updates directly in your inbox.
How to Create an Alert
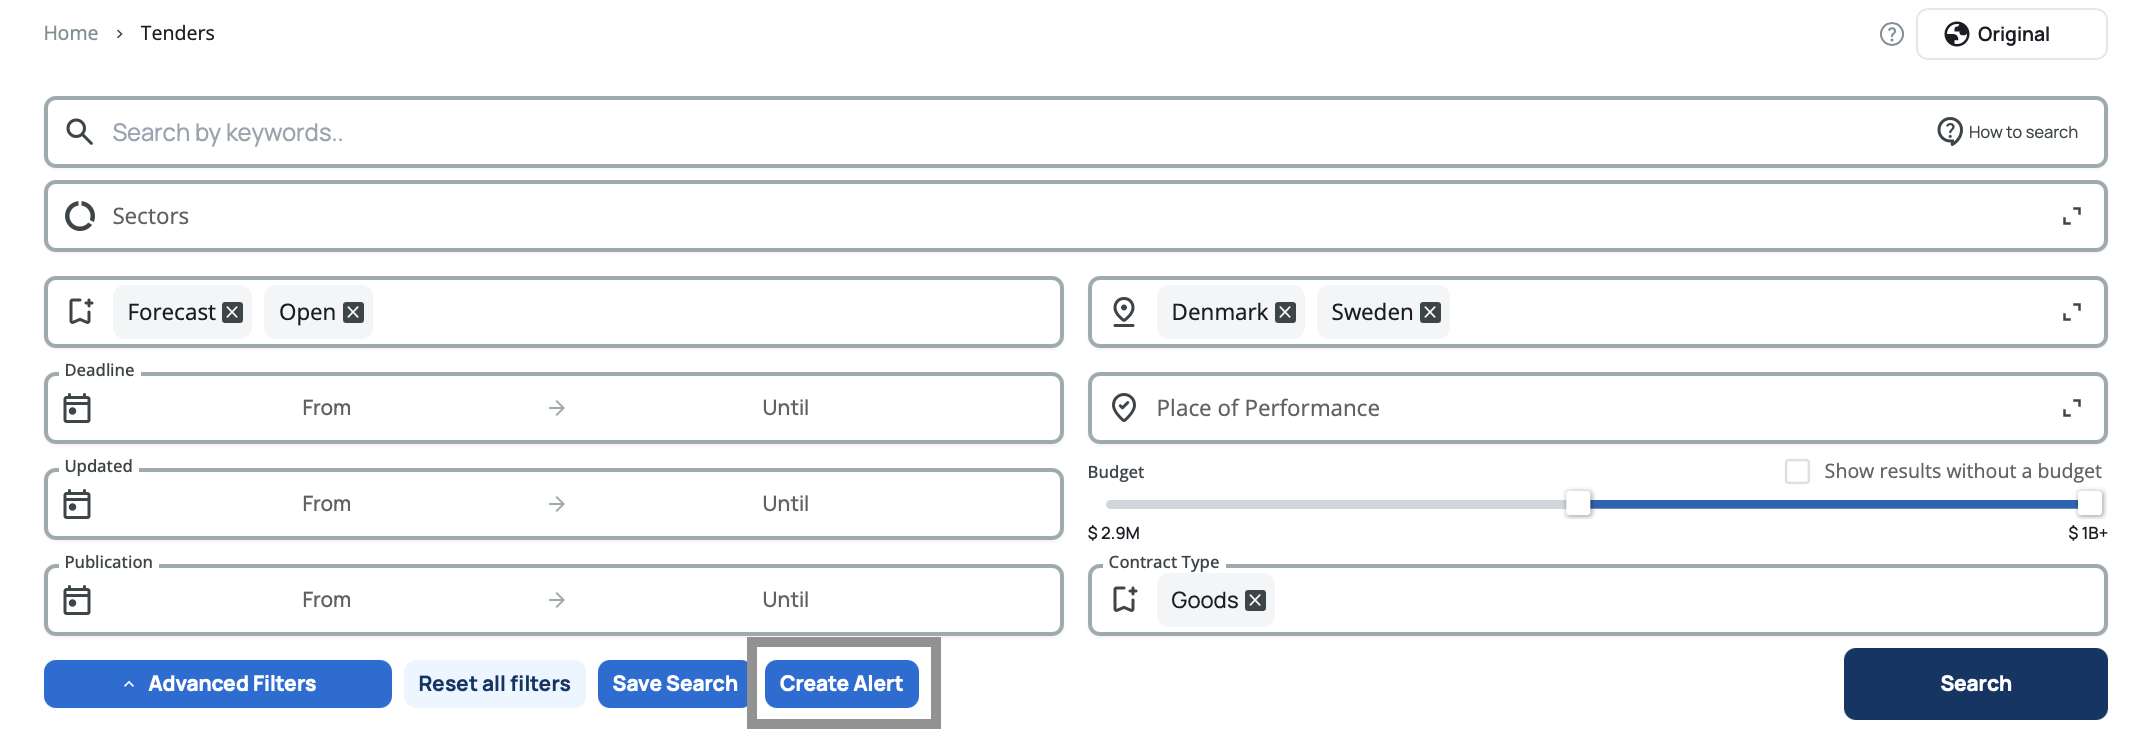
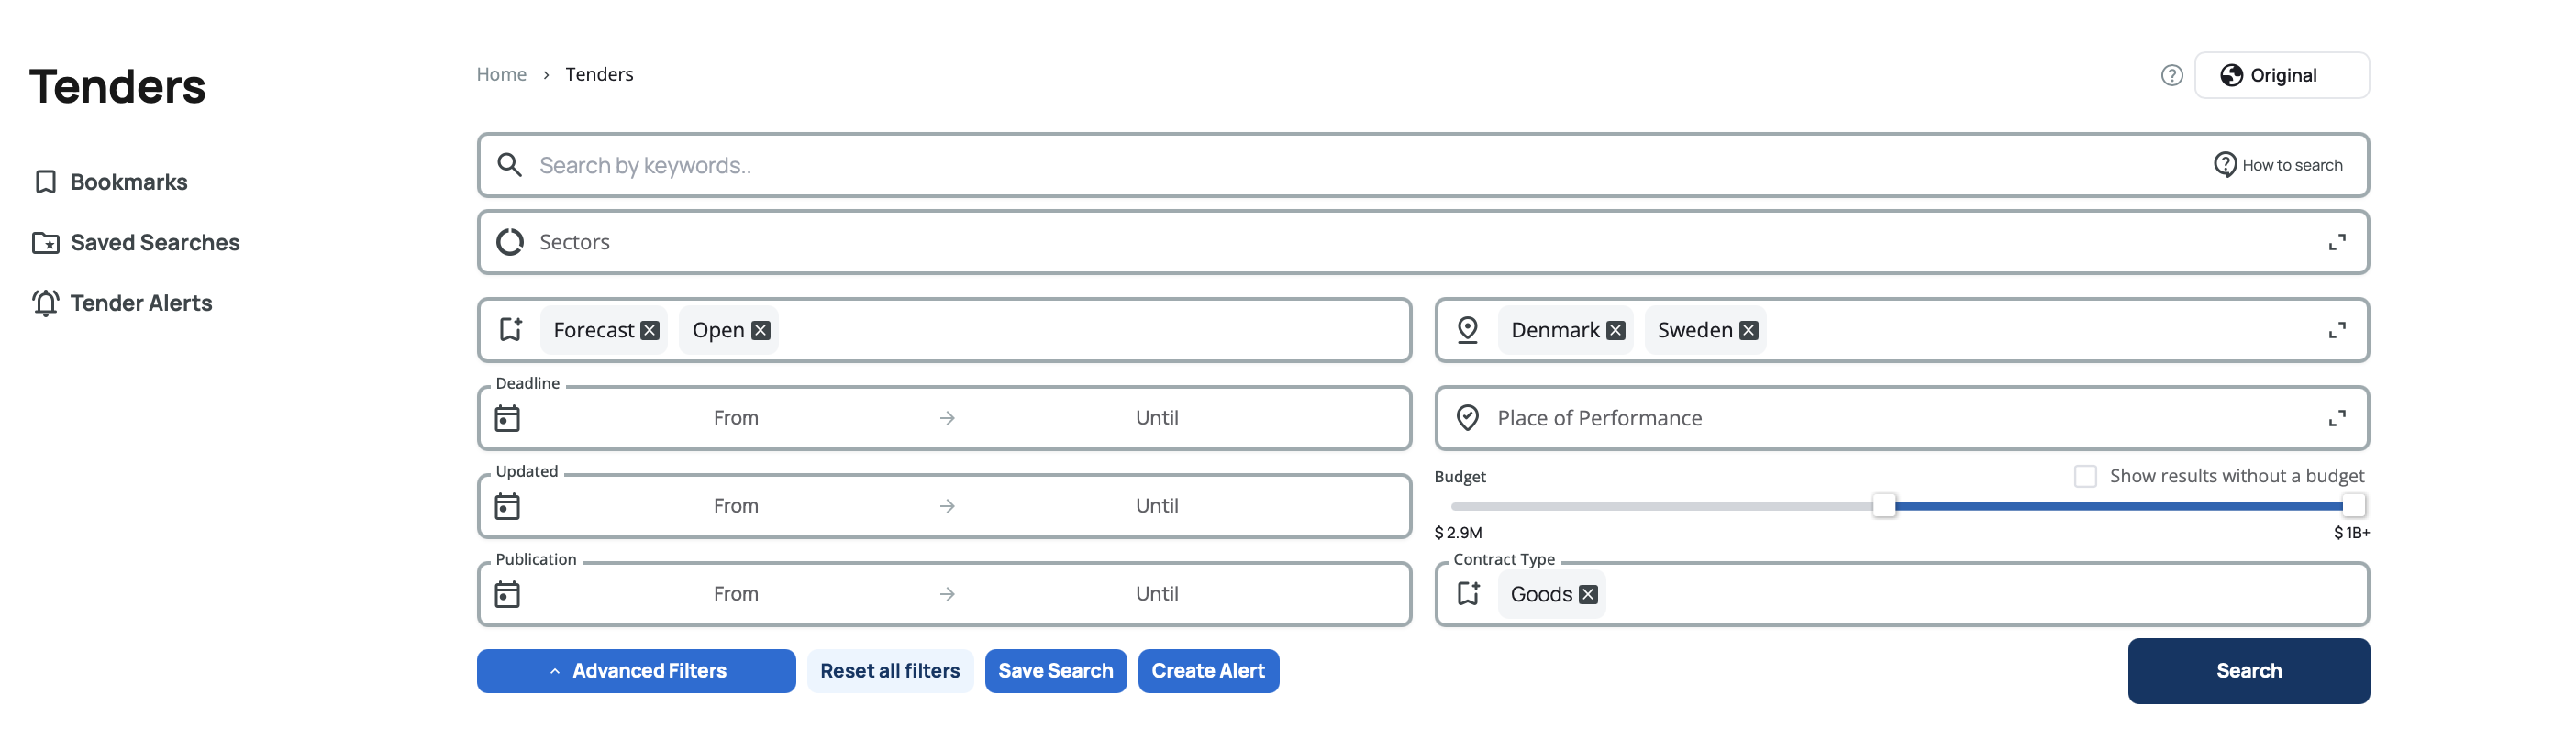
After applying filters in the tender search engine, click the Create Alert button to set up email notifications for matching tenders.
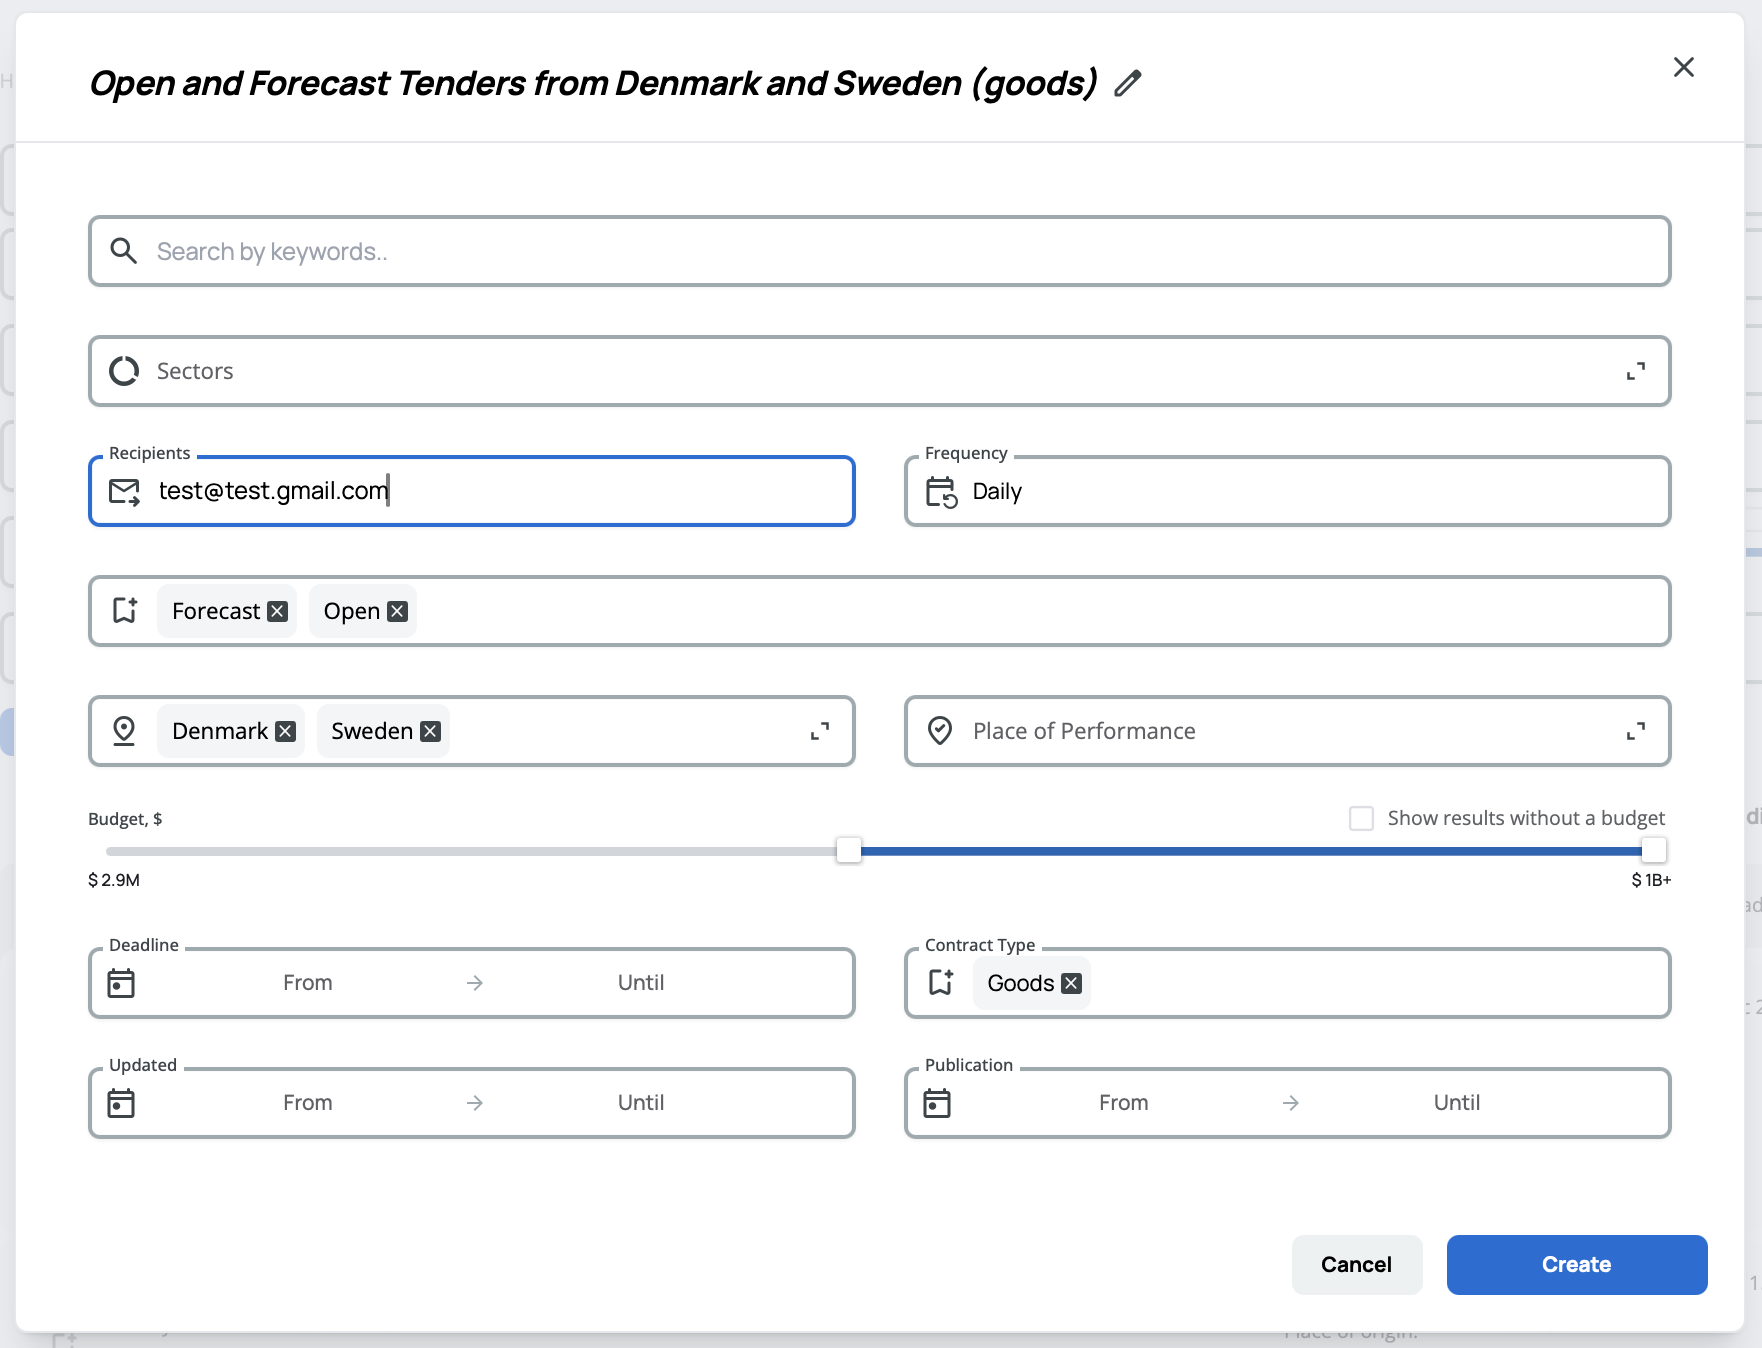
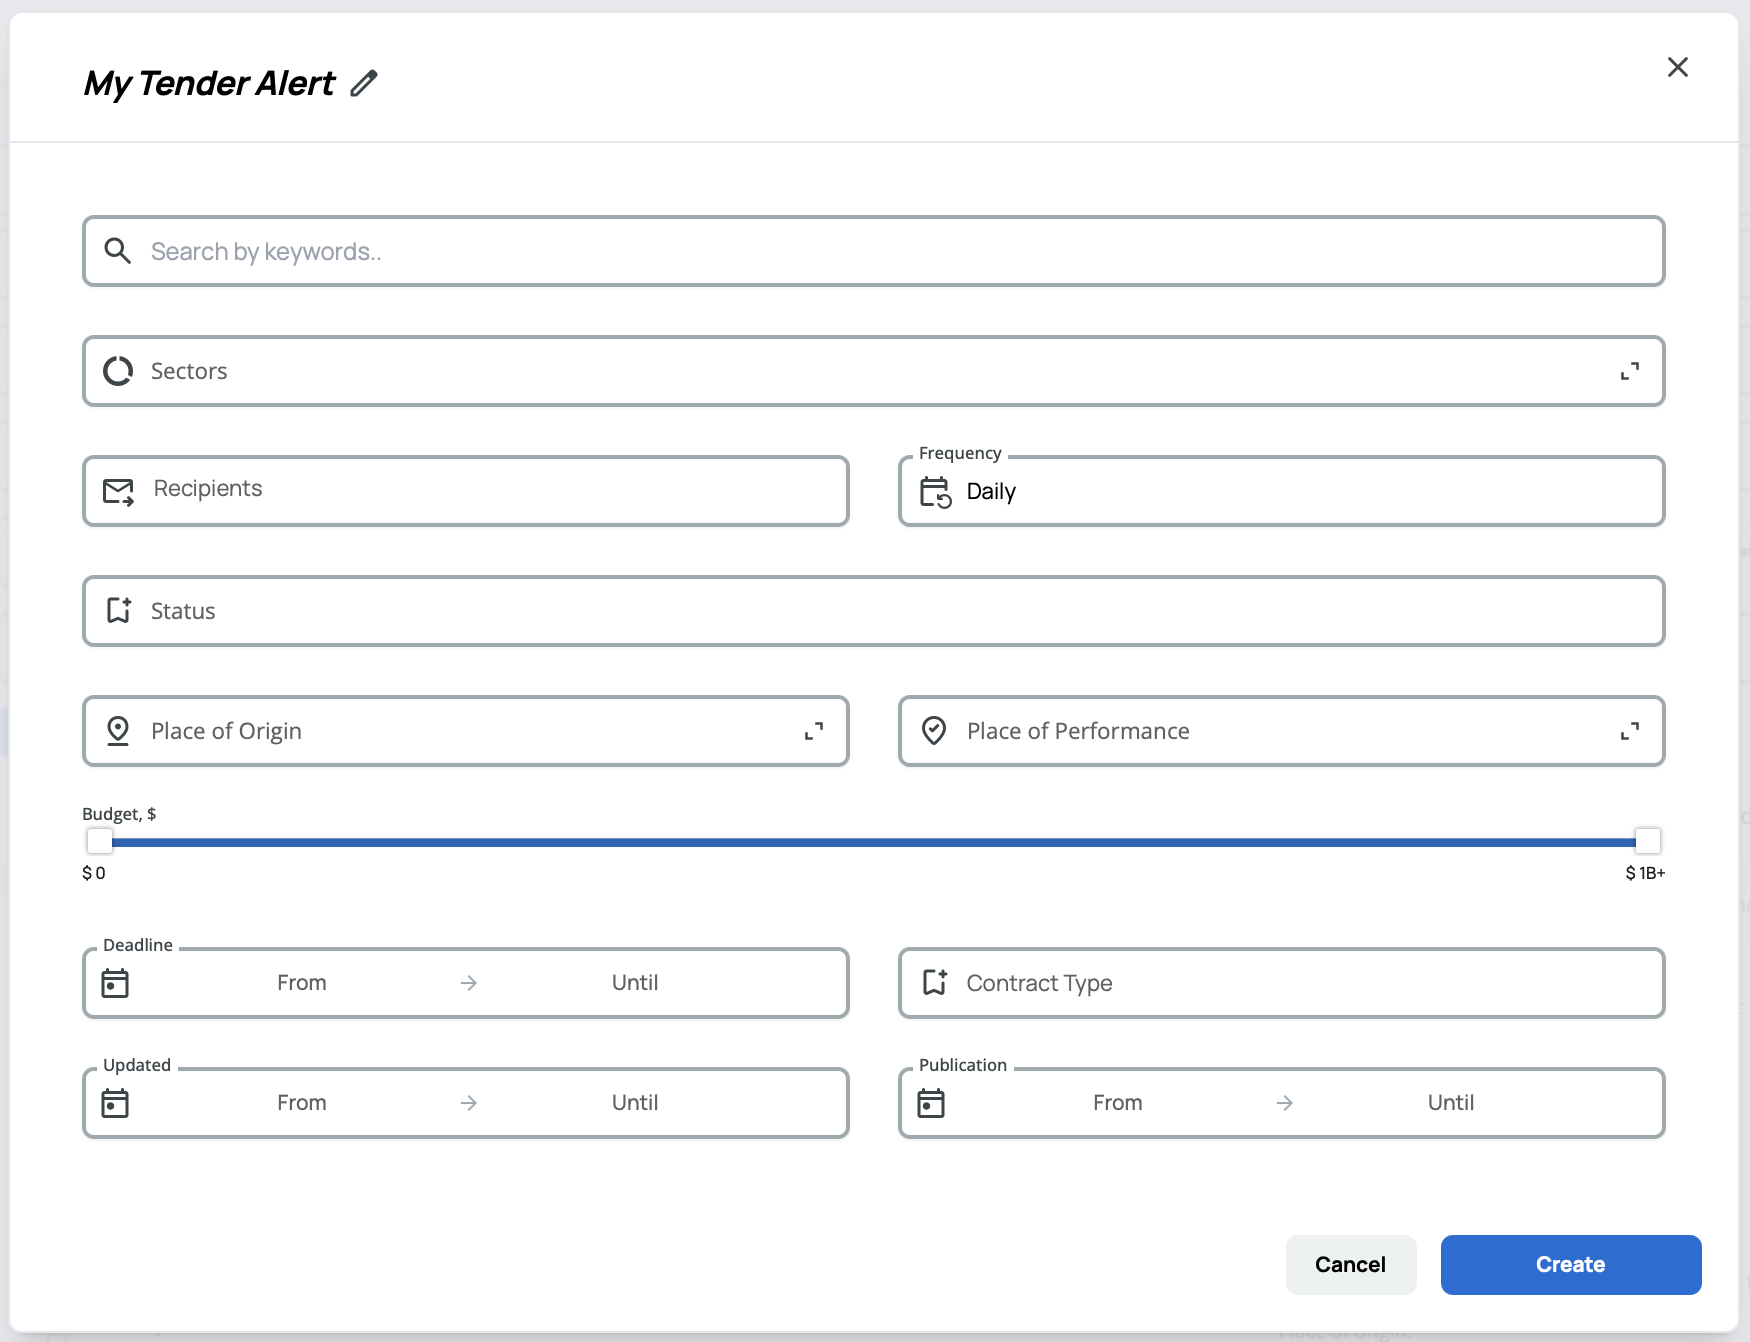
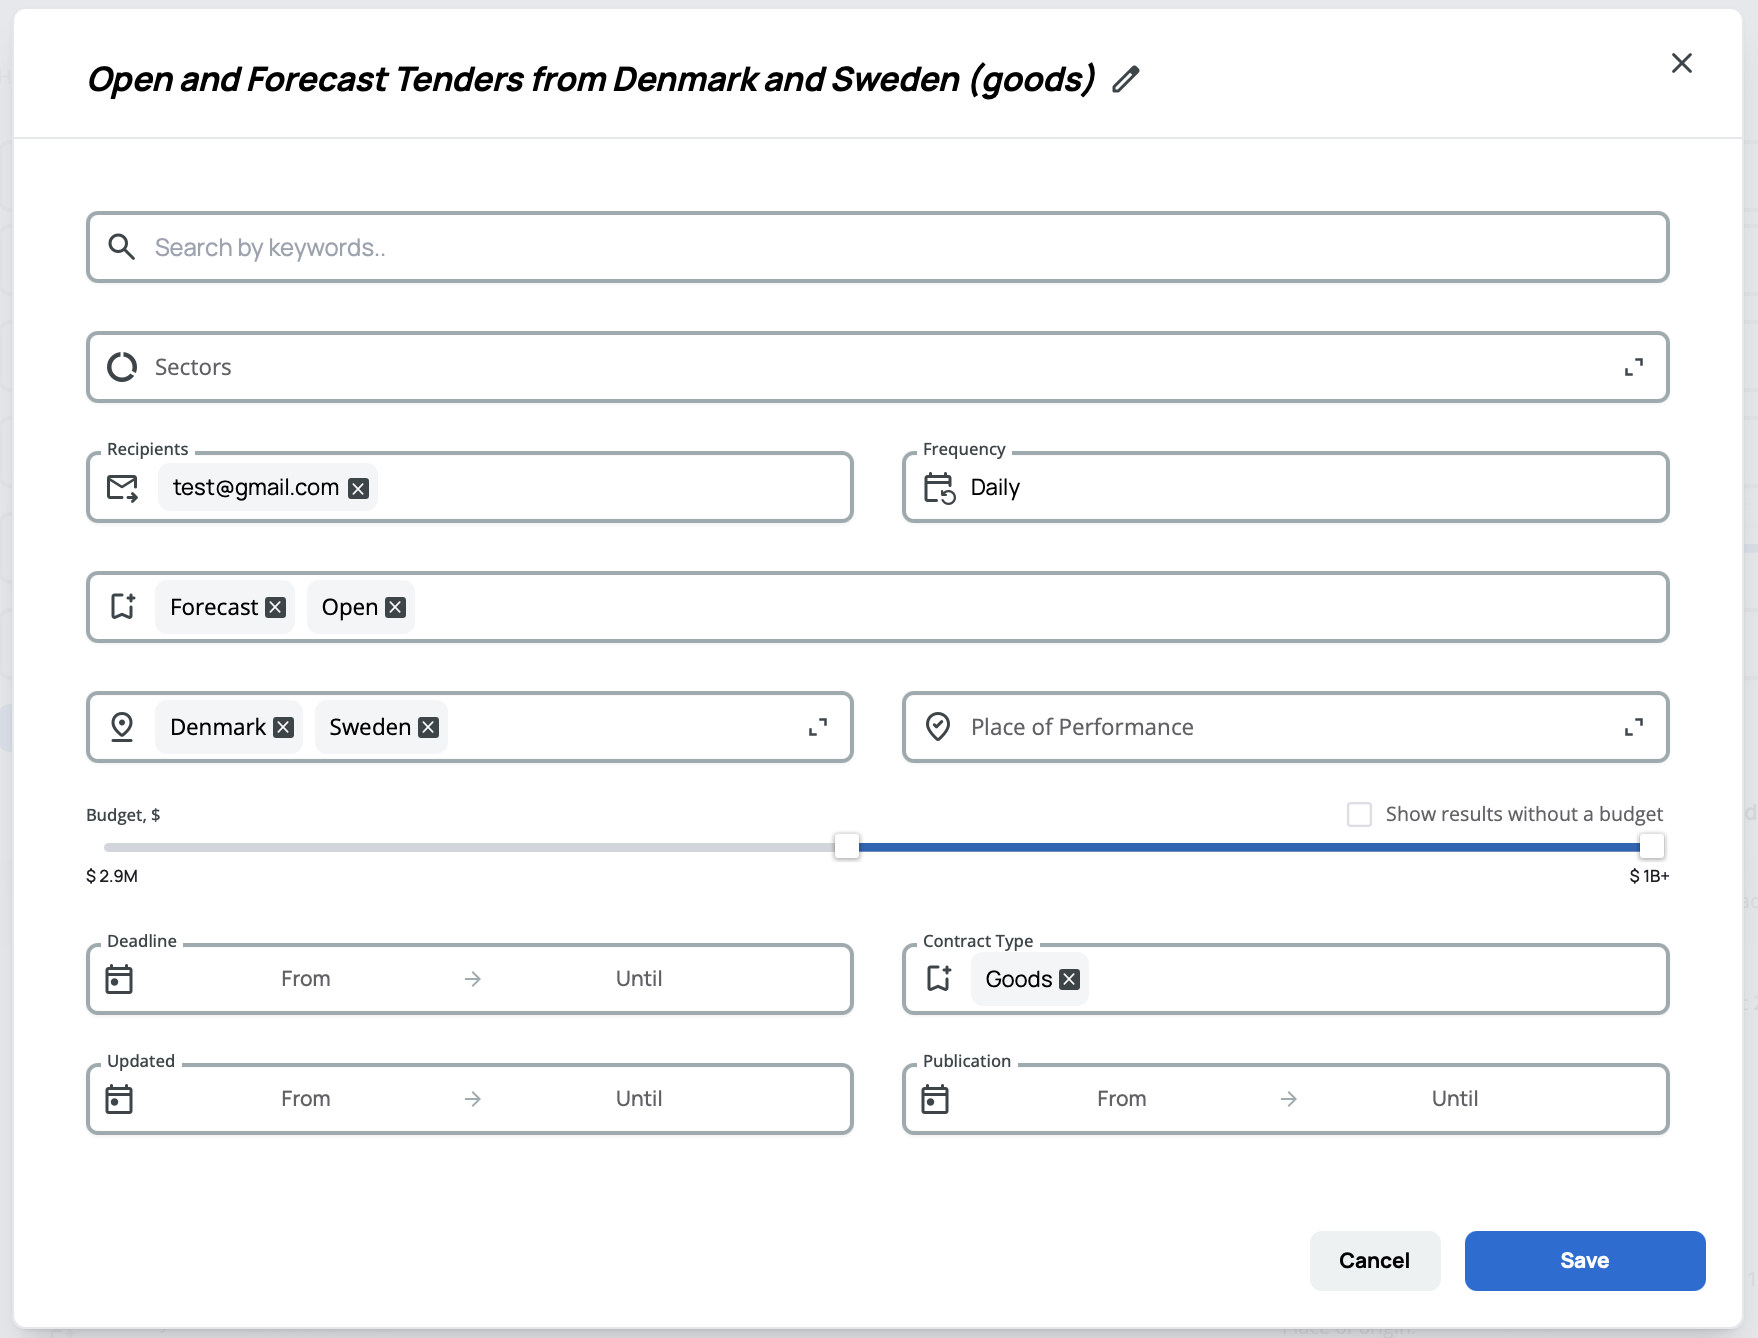
A pop-up window opens showing all available filter fields with your previously selected filters pre-filled. You can adjust any filters before creating the alert. Additionally, you'll need to configure:
Title – Give your alert a meaningful name to help you identify it later.
Frequency – Choose how often you want to receive email notifications (e.g., Daily, Weekly).
Recipients – Add email addresses for people who should receive the alerts.
Set alert frequency based on your industry's pace. For fast-moving sectors, daily alerts keep you informed. For slower markets, weekly digests might be sufficient to avoid inbox clutter.
Use descriptive alert names like "Daily EU Construction Alerts" or "Weekly IT Services Under $100K" so you can quickly identify them when managing multiple alerts.
There is a limit to how many alerts you can create according to your plan. If you reach this limit, you'll need to delete some alerts before adding new ones.
Accessing Tender Alerts
Your tender alerts appear in the left panel of the tender search page, below Saved Searches. You can also access them from your user profile.

Click Tender Alerts to open the full list and manage your alerts.
Managing Tender Alerts
When you click on Tender Alerts, a pop-up window opens with your list of alerts in a table. In the top right corner, you'll find a Create button to add new alerts.
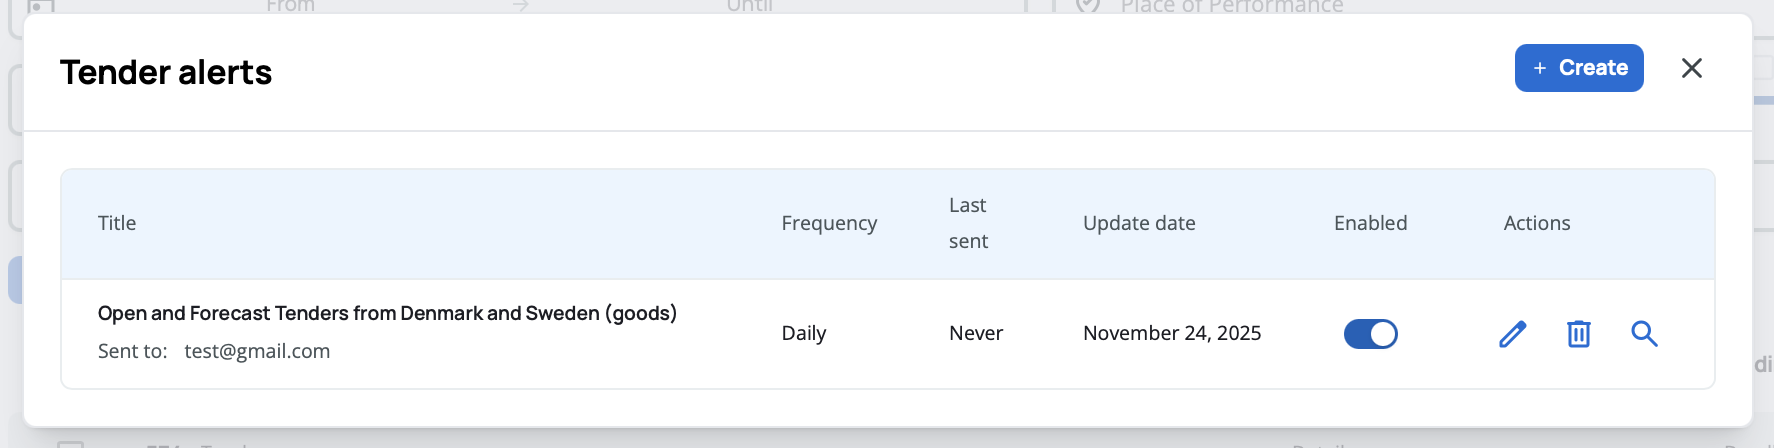
The alerts table displays the following columns:
Title – The name you gave to the alert.
Frequency – How often the alert sends email notifications (Daily, Weekly, Twice a week, Monthly).
Last Sent – When the alert last sent an email notification.
Update Date – When the alert was last modified.
Enabled – A toggle switch to quickly enable or disable the alert. Disabled alerts won't send emails but remain saved for future use.
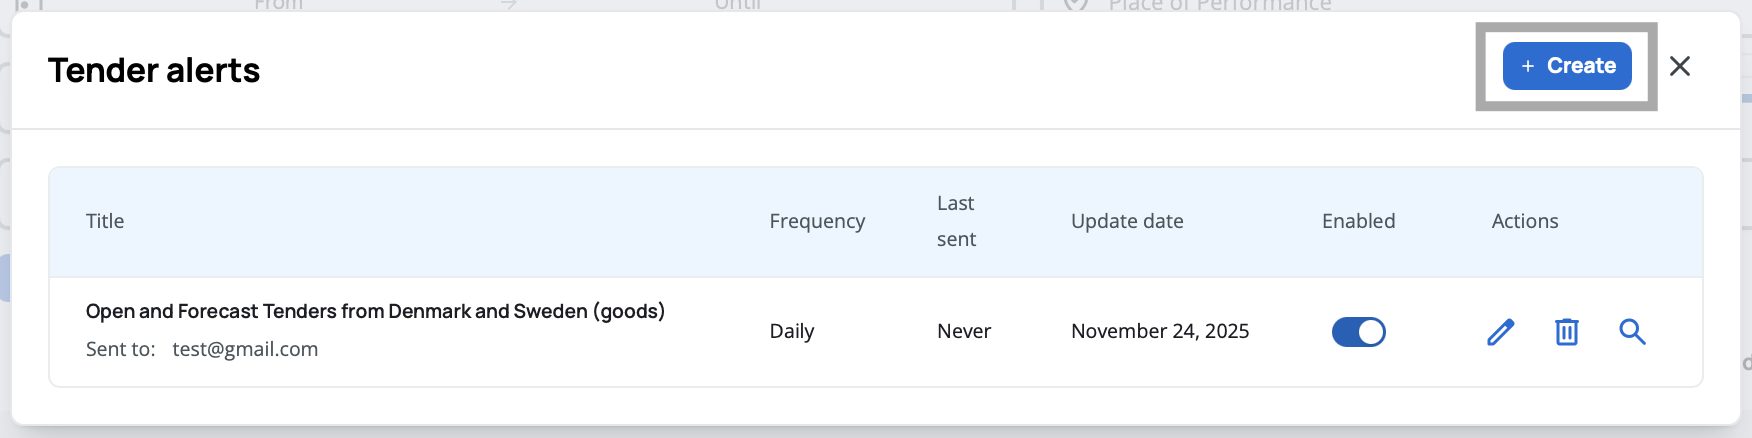
Actions – Options to Create, Perform, Edit, or Delete alerts.
Create – Opens the same filter pop-up you see when creating an alert from the search engine, but with all fields empty. You can build a new alert from scratch without leaving this view.
Each alert in your list has three action options:
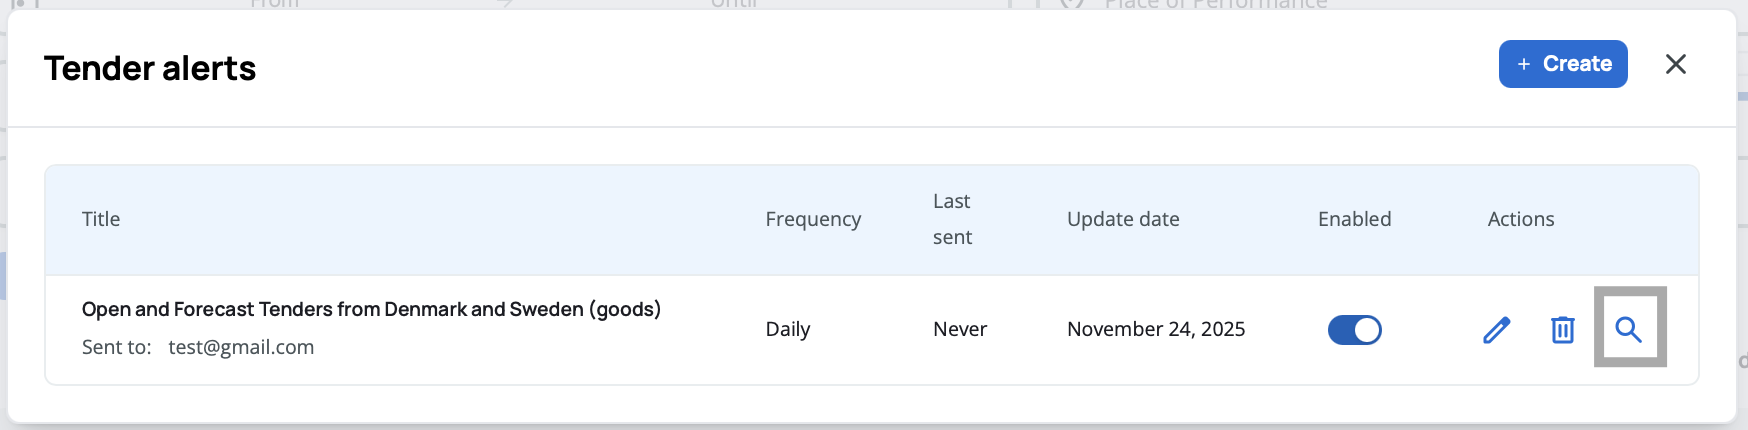
Perform – Applies the alert's saved filters to the search engine immediately, showing you matching tenders without waiting for the next email.
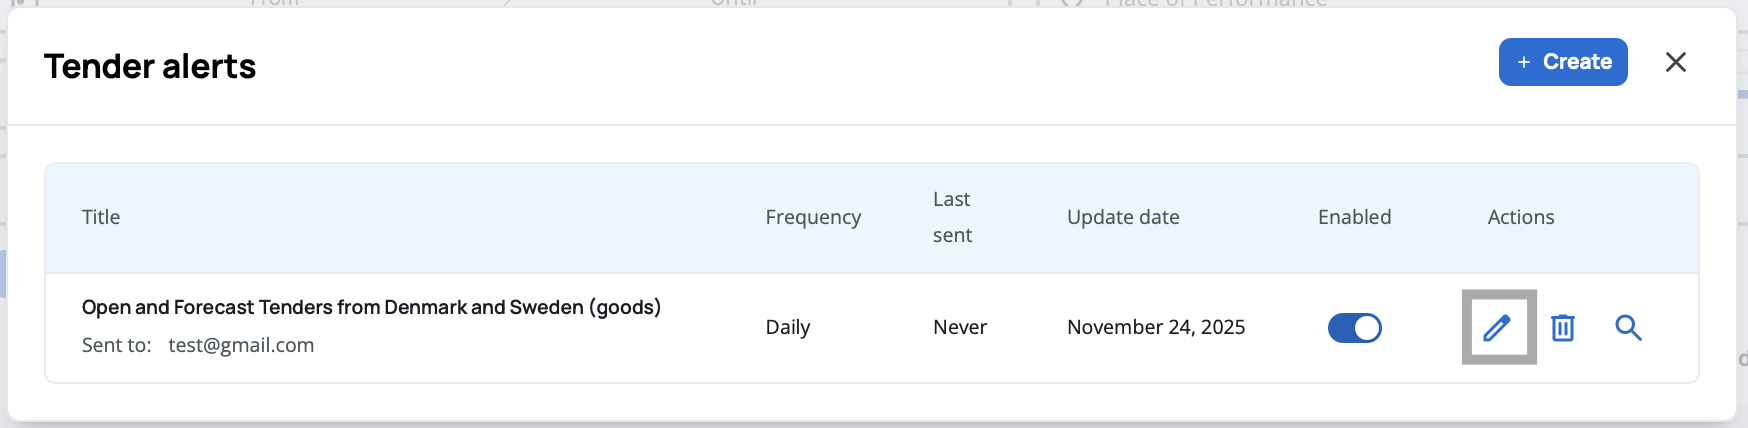
Edit – Opens a pop-up with all filters and your current selections pre-filled. You can modify filters, change the frequency, update recipients, or adjust the alert title.
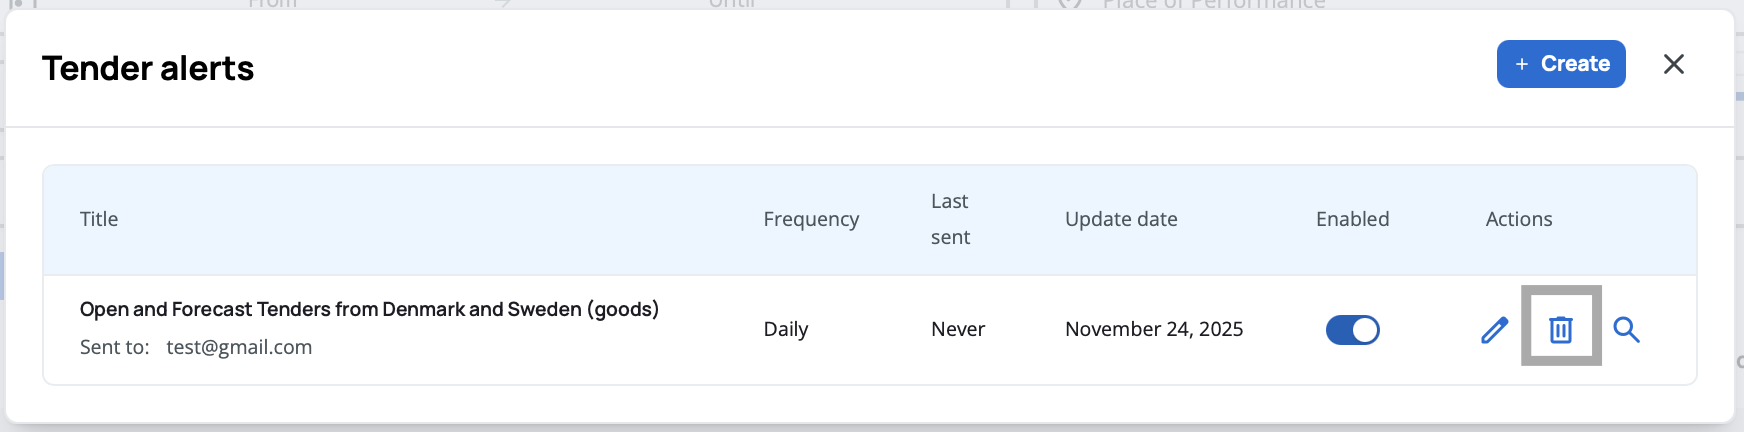
Delete – Removes the alert from your list. A confirmation pop-up appears before deletion to prevent accidental removal.
Use the enable/disable toggle when you temporarily don't need certain alerts. This is perfect for seasonal businesses or when you're taking a break from bidding on specific tender types.
Regularly review your alerts to ensure they still match your business needs. Edit alert frequencies if you're receiving too many or too few notifications.
Performing an Alert
When you click Perform on an alert, the system immediately applies all the alert's saved filters to the search engine and displays matching tenders. This lets you see what tenders currently match your alert criteria without waiting for the next scheduled email.
Use the Perform action before adjusting your alert settings. This helps you verify that your filter criteria are capturing the right opportunities.
Editing an Alert
When you click Edit on an alert, the filters pop-up opens with all your previously selected criteria already filled in. You can:
- Add or remove filters
- Adjust date ranges or budget limits
- Change sectors, countries, or contract types
- Update the alert title
- Modify email frequency
- Add or remove recipients
After making your changes, click Save to update the alert.
If you're receiving too many notifications, try narrowing your filters or reducing the frequency. If you're missing opportunities, broaden your criteria or increase the notification frequency.
Enabling and Disabling Alerts
Each alert has a toggle switch that lets you quickly enable or disable it. When an alert is disabled:
- It stops sending email notifications
- It remains in your alerts list with all settings preserved
- You can re-enable it anytime by clicking the toggle


This is useful when you want to pause alerts temporarily without losing your configuration.
Disable alerts during busy periods when you can't respond to new opportunities, then re-enable them when you're ready to resume bidding.
Deleting an Alert
When you click Delete on an alert, a confirmation pop-up appears asking you to confirm the deletion. This prevents you from accidentally removing alerts you still need.
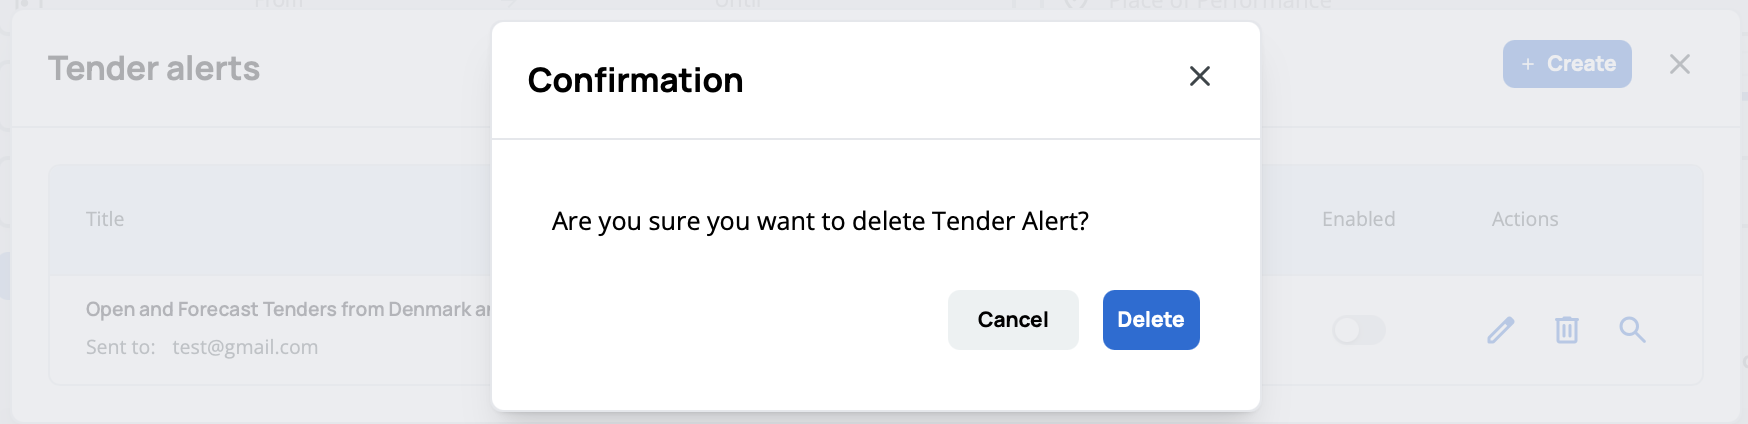
Click Delete to permanently remove the alert, or Cancel to keep it.
Consider disabling alerts instead of deleting them if you might need the same criteria again. You can always delete later if you're sure you won't use them.