User Profile
All personal data shown in the screenshots below has been edited for privacy and demonstration purposes. Please note that you cannot create accounts with fake data—your email address must be verified to activate your account.
Accessing Your Profile
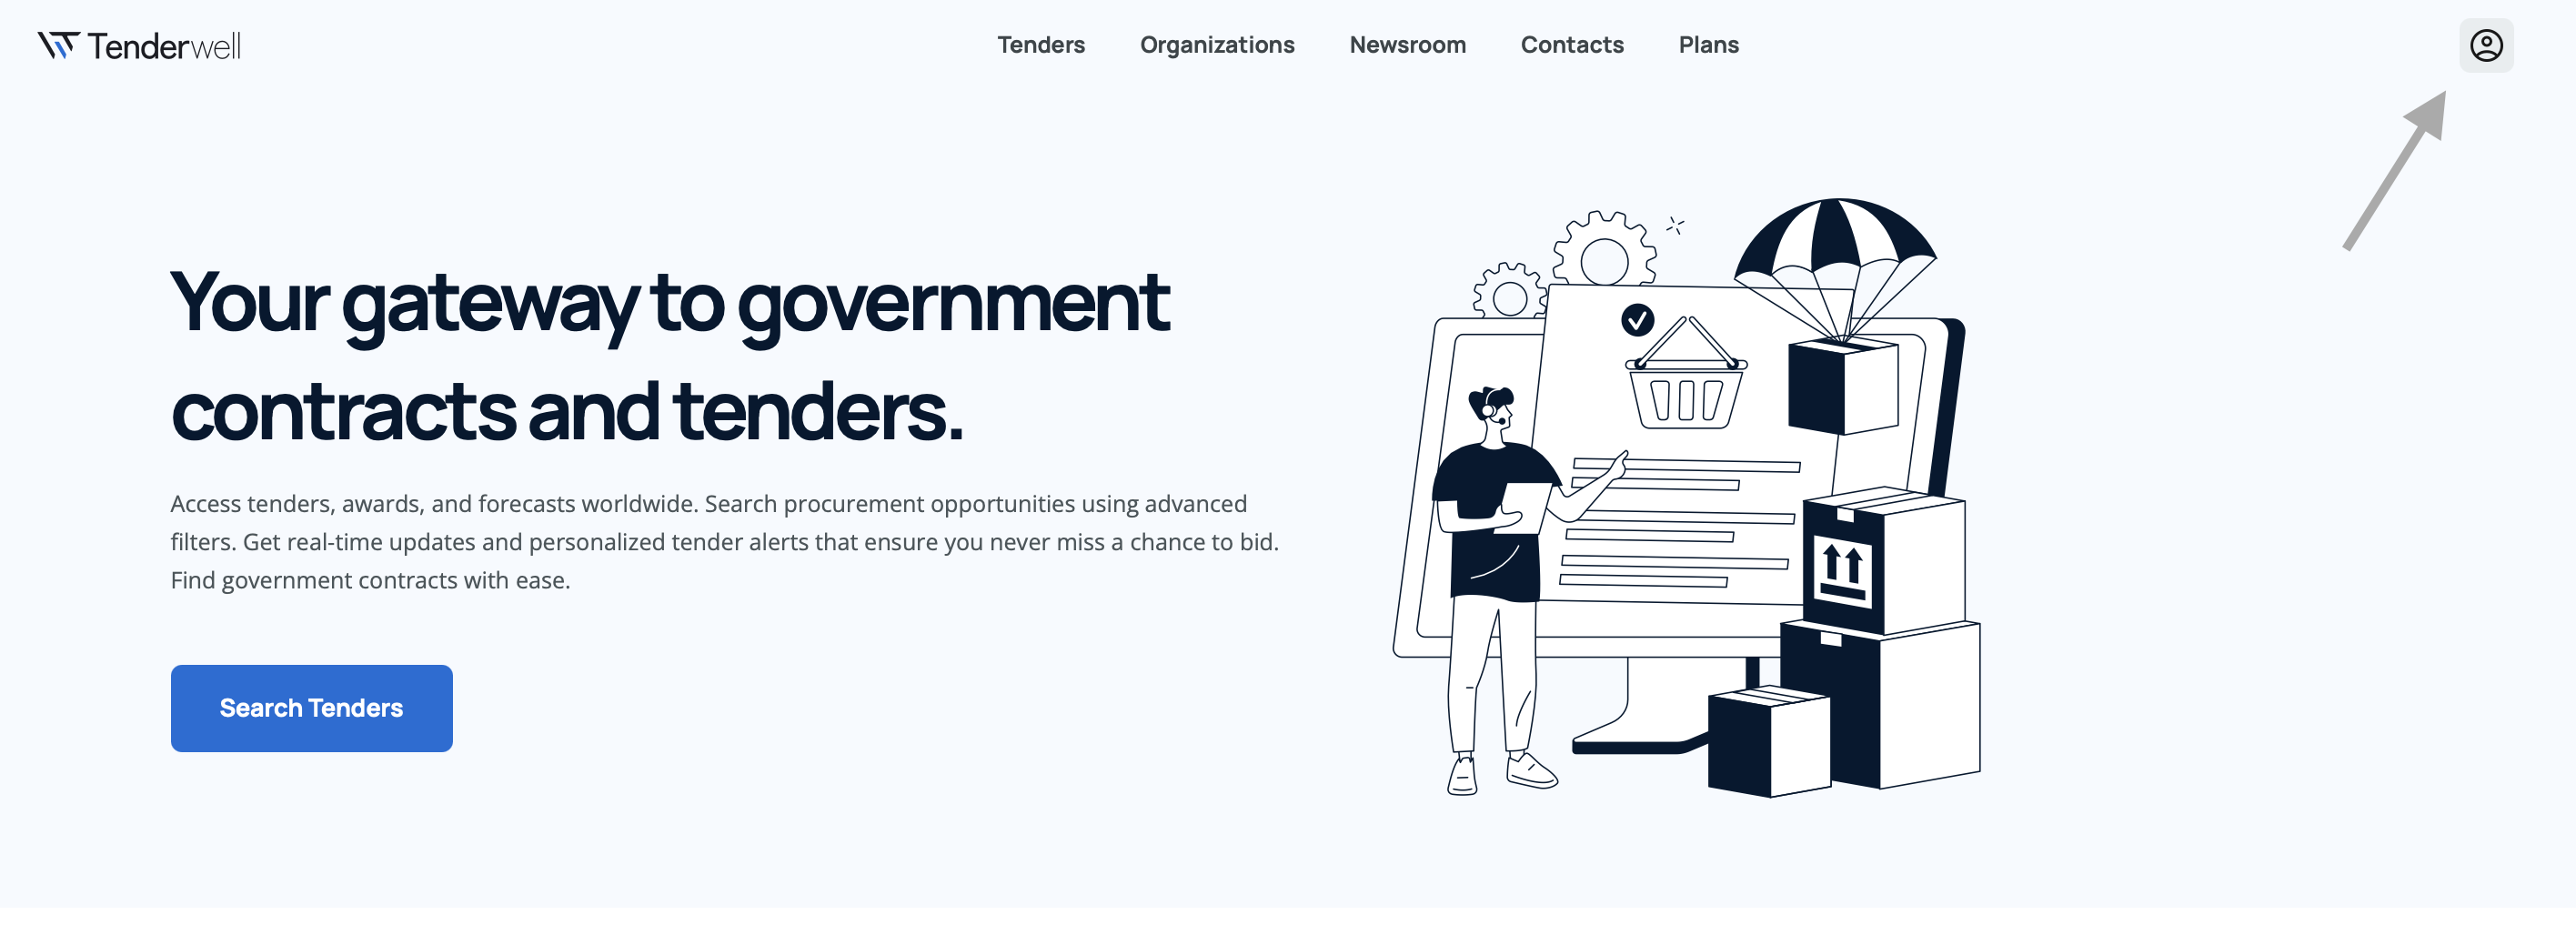
Your user profile is your central hub for managing account details, subscription plans, team members, billing information, and preferences. To access your profile, click on your profile icon in the top navigation bar after logging in.
Profile Overview
Once you access your profile, you'll see a comprehensive view with multiple sections for managing different aspects of your account.
The profile view displays the following sections:
- Profile – Your basic account information with editing options
- Plan – Current subscription and financial data
- Team – Invite members, manage team, and track invitations
- Billing – Invoice history and downloads
- Newsletter – Email notification preferences
- Settings – Account configuration and deletion options
- Bookmarks – Quick access to your bookmarked tenders
- Saved Searches – Manage your saved search queries
- Tender Alerts – Configure and manage your email alerts
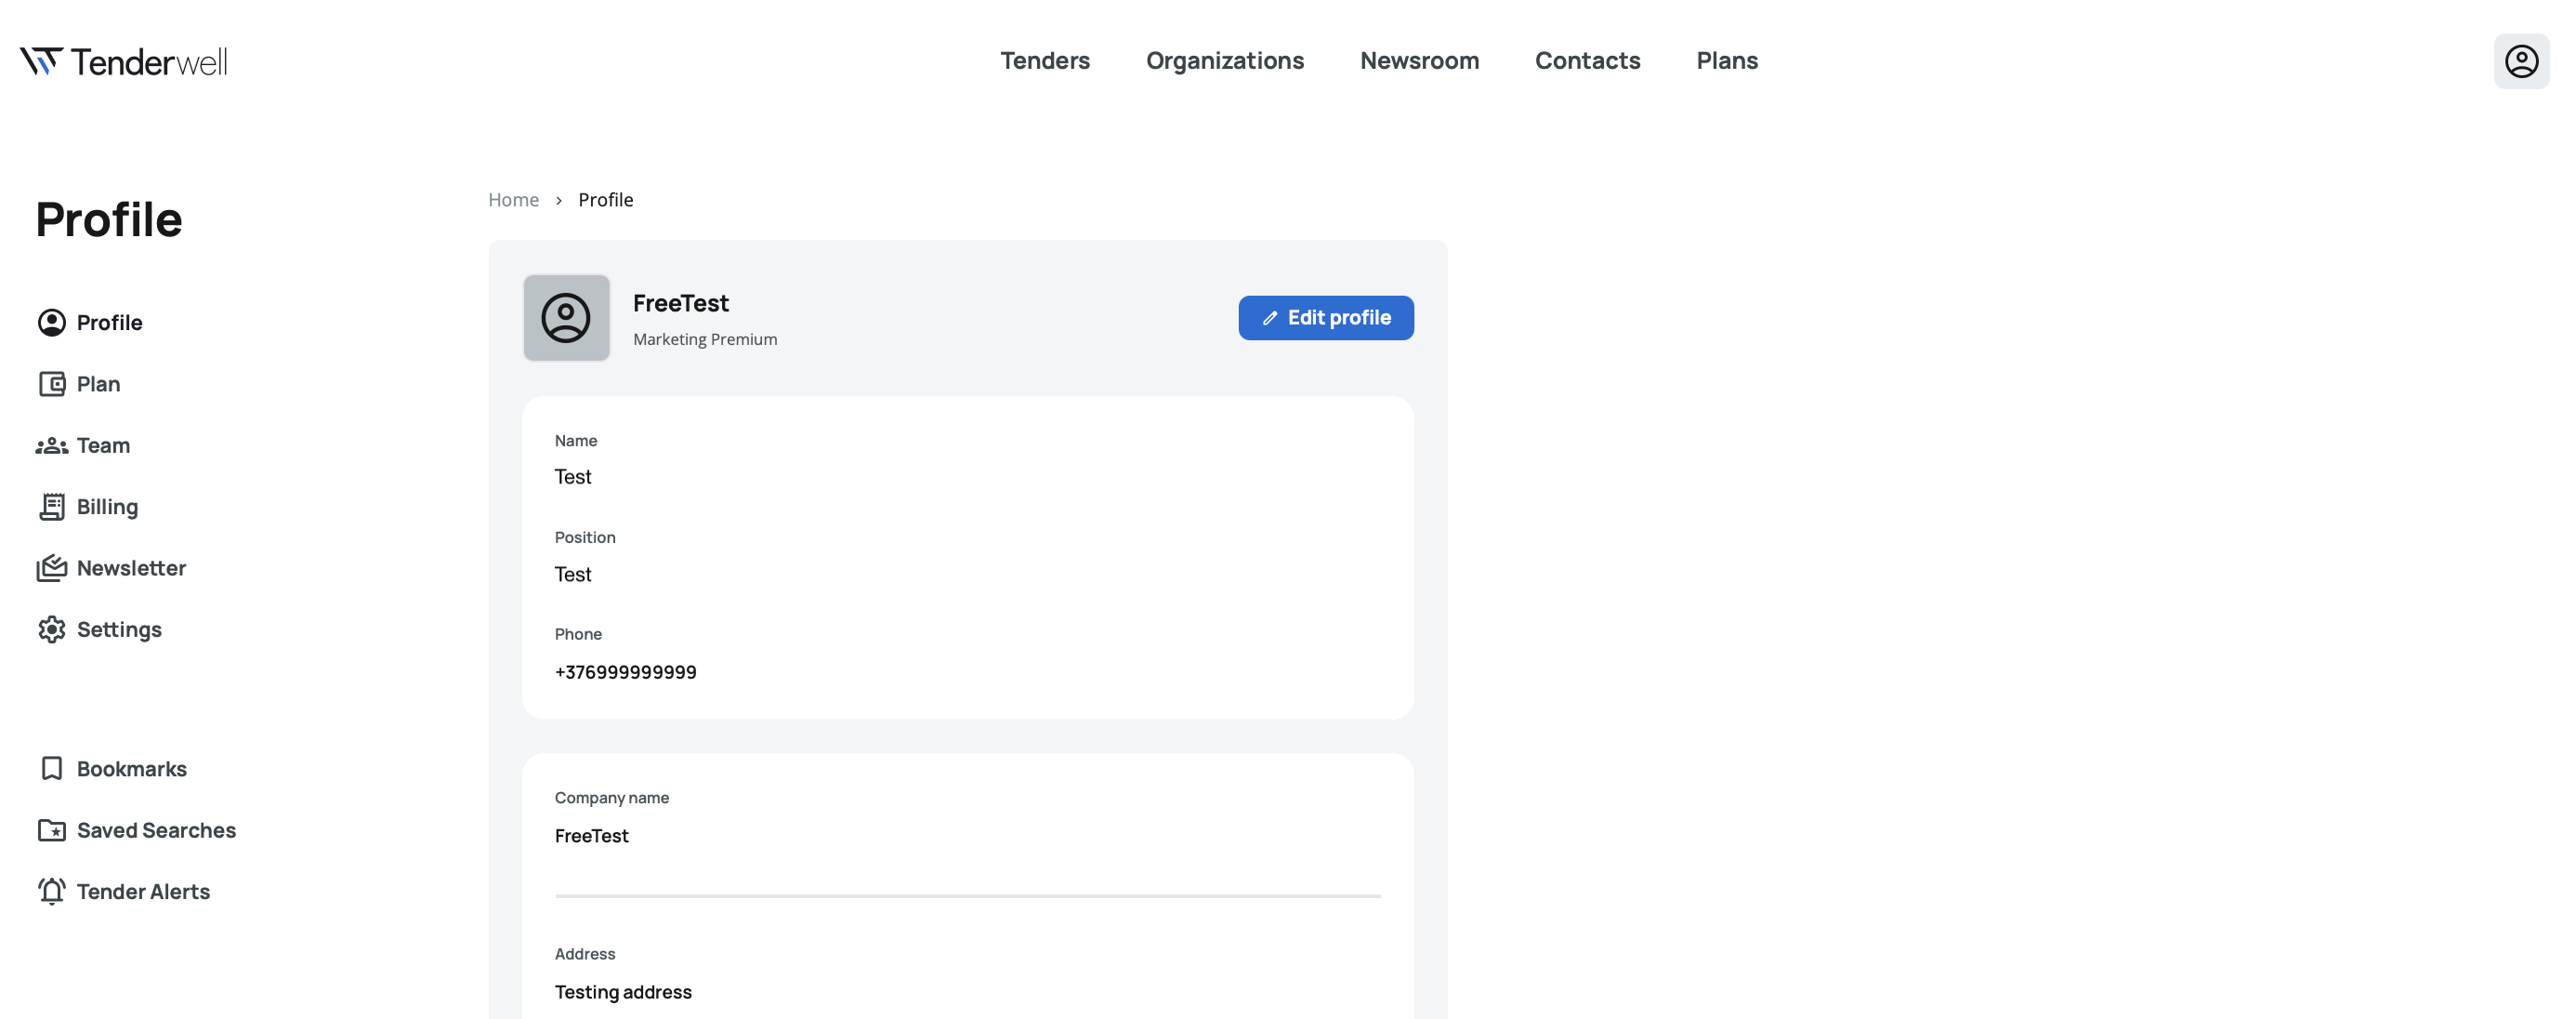
Profile
Profile Information
The profile section displays your basic account information:
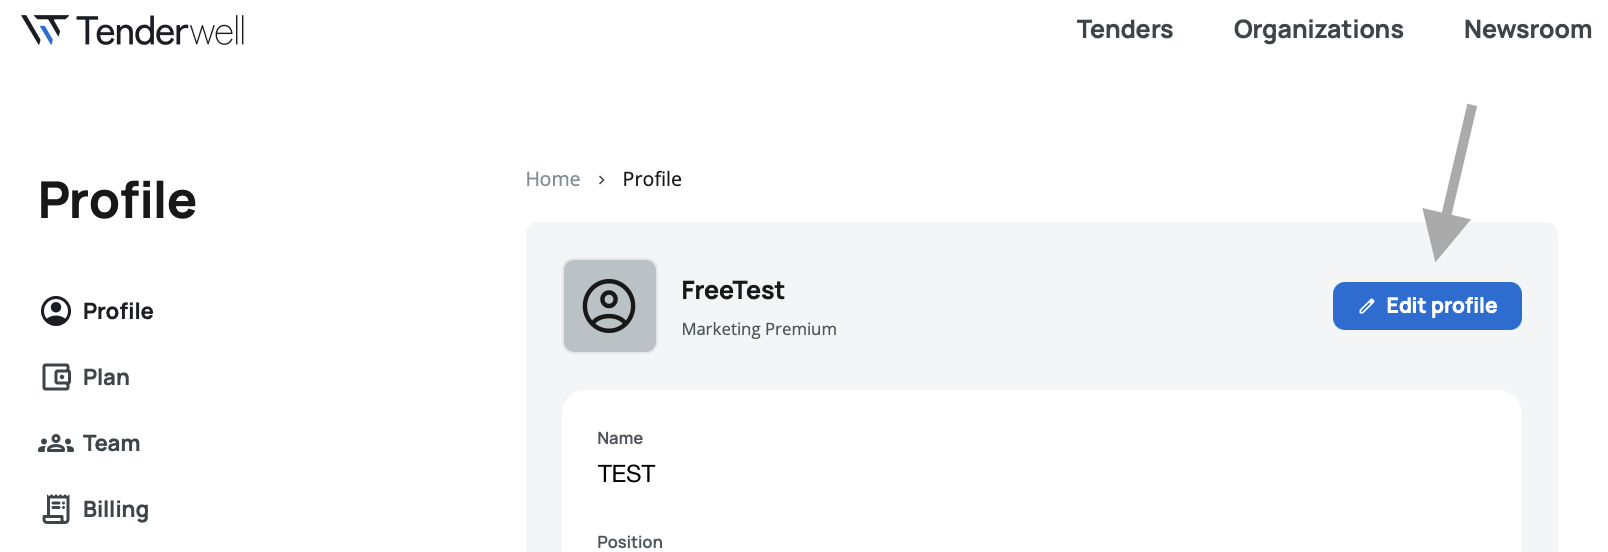
Profile Photo – Your profile picture appears at the top left, alongside your name and subscription type (e.g., Free, Premium, Custom).
Edit Profile Button – Located on the right side of the first line, this button allows you to modify your profile details.
Your profile section displays the following information:
- Name – Your full name
- Position – Your job title or role
- Phone – Your contact phone number
- Company Name – The name of your organization
- Address – Your company's street address
- Country – Your company's country location
- VAT Number – Your company's tax identification number
- Website – Your company's website URL
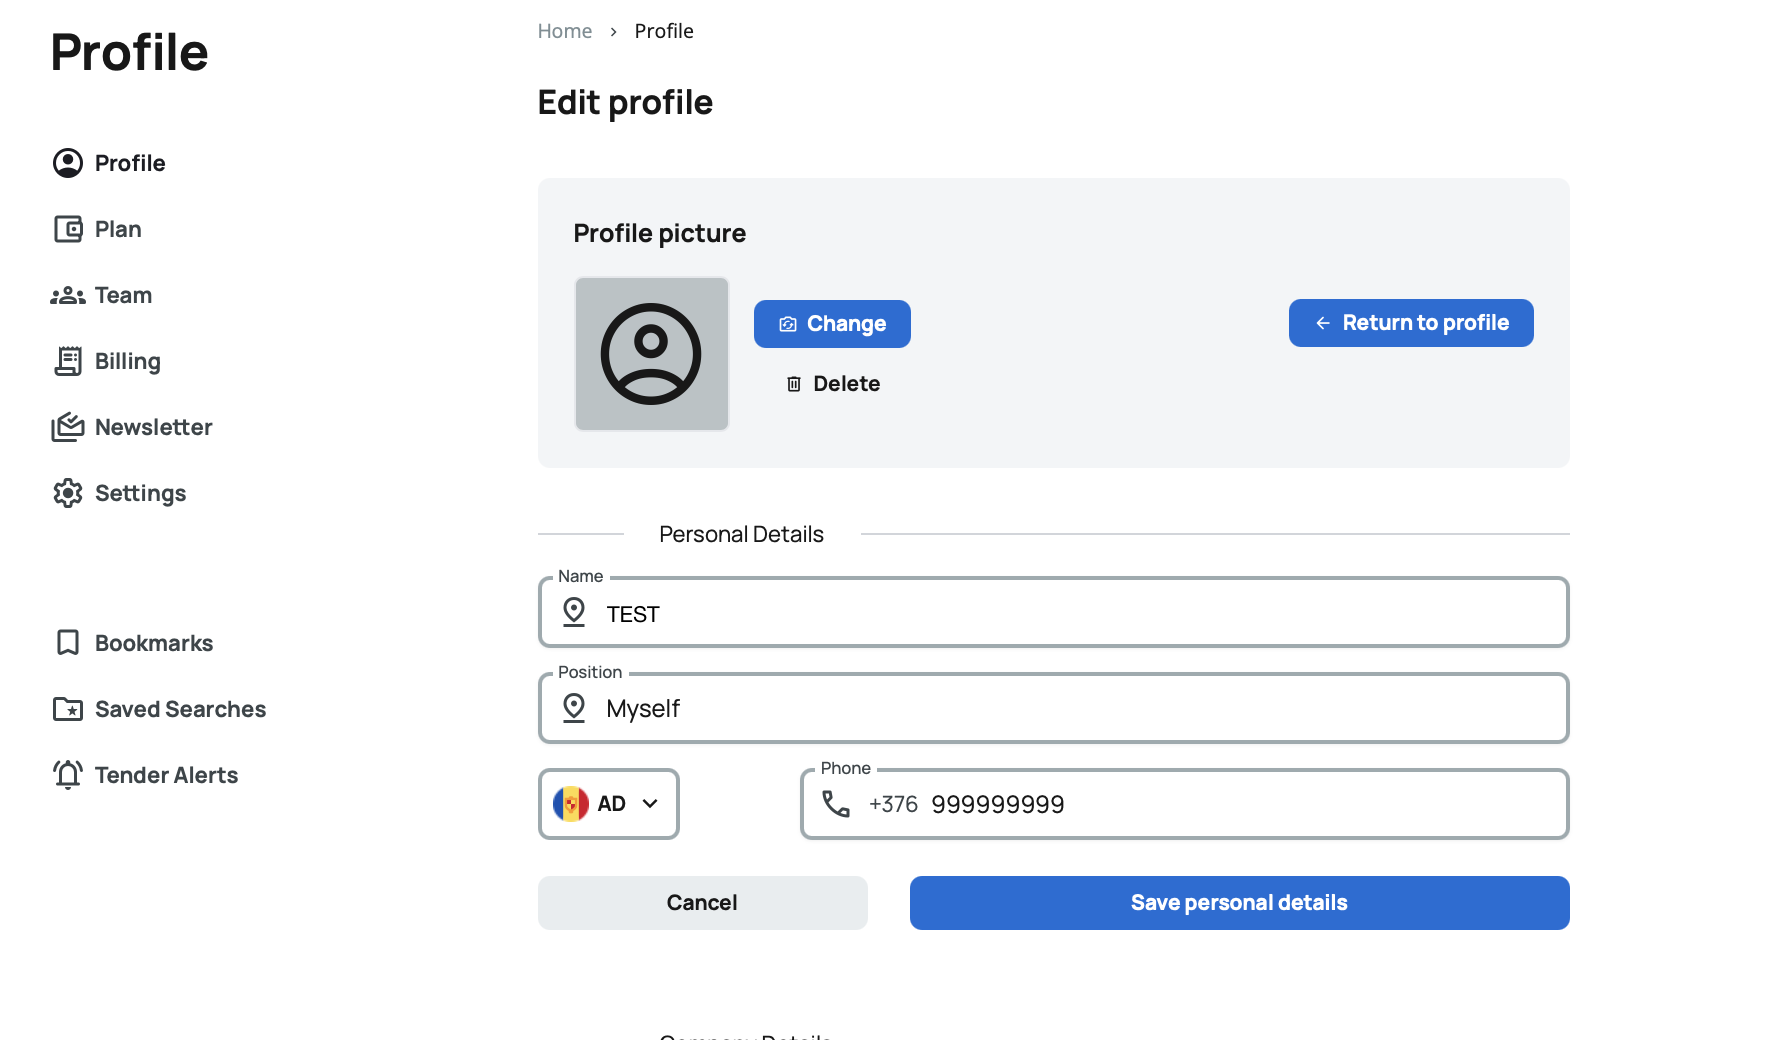
Editing Your Profile
Click the Edit Profile button to modify any of your profile details.
Make your changes in the editable fields, then click the Save button to apply your updates.
Keep your profile information current, especially your contact details and company information. This ensures accurate invoicing and helps team members identify you correctly.
Plan
The plan section shows your subscription details and financial information in two separate panels.
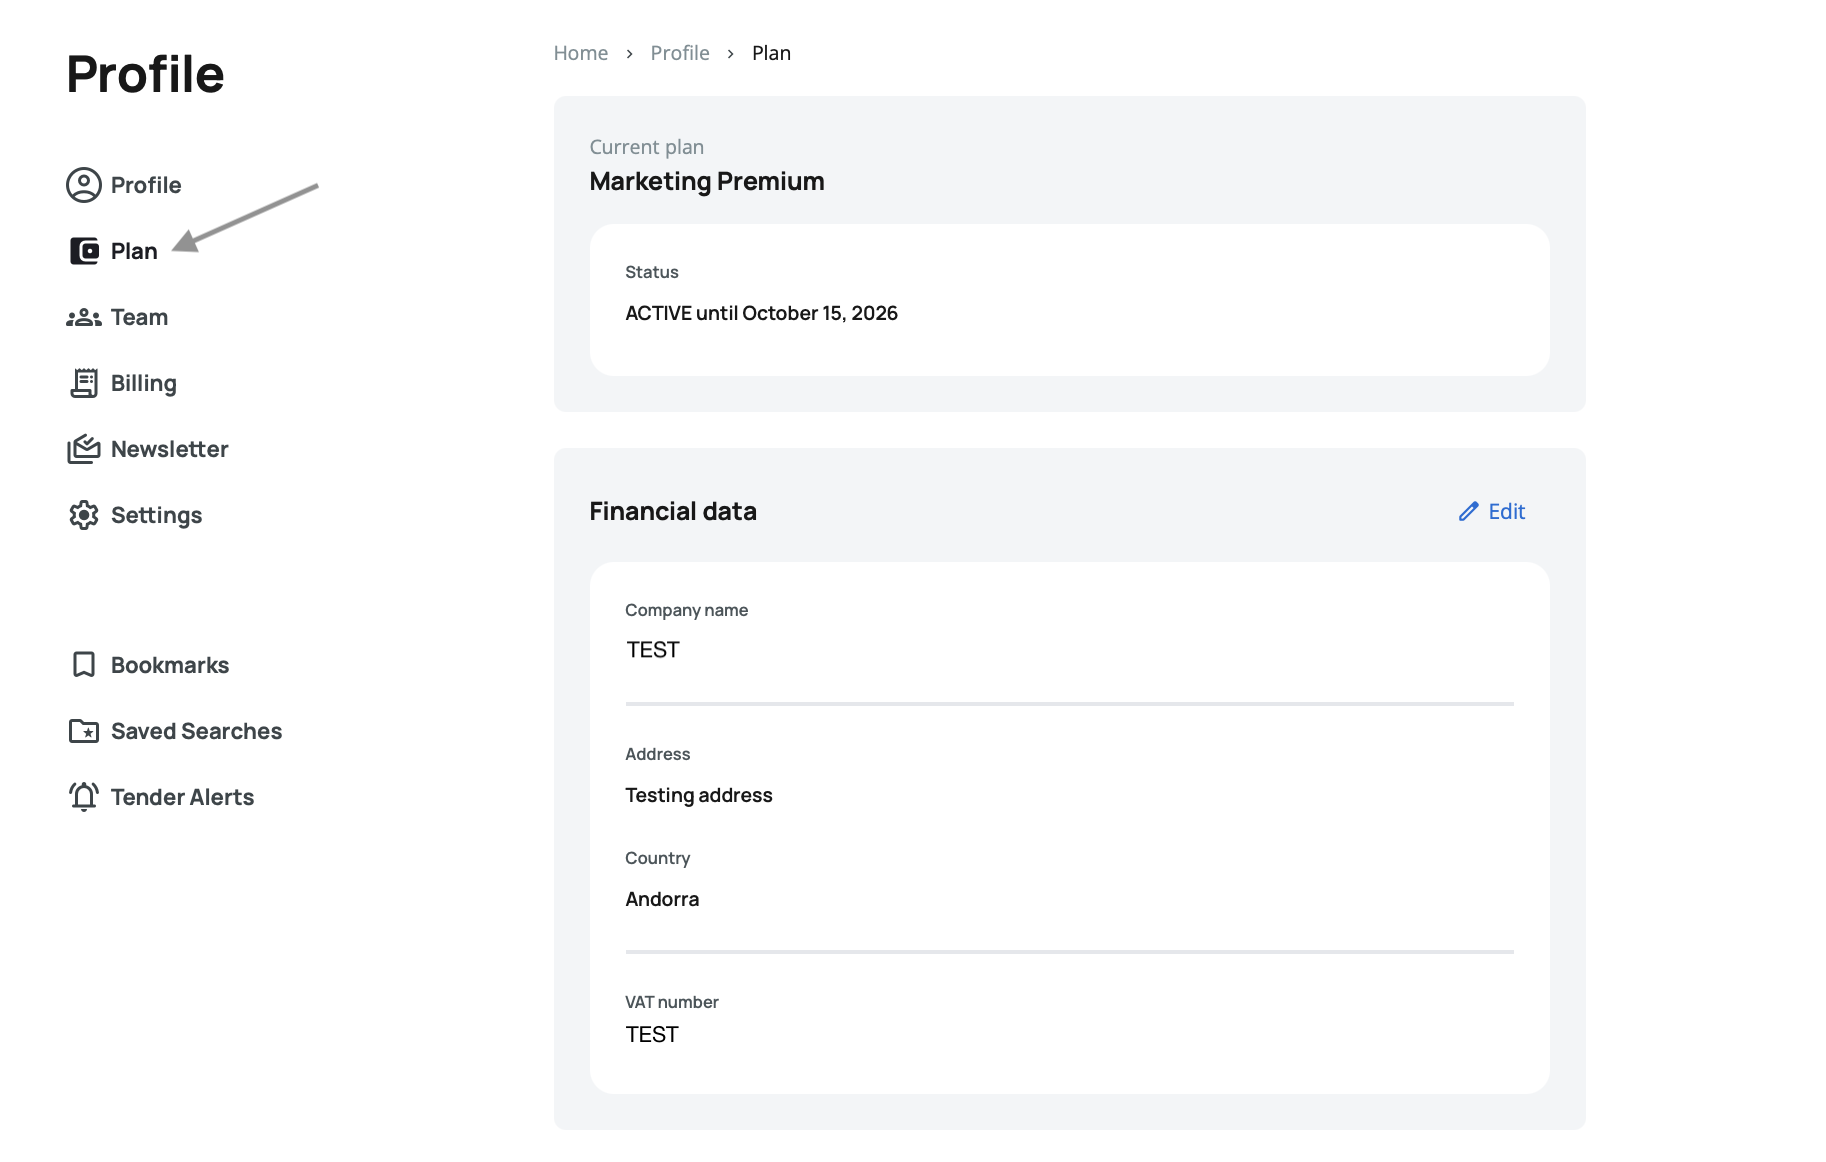
Current Plan
Displays your active subscription plan with its status:
- Plan Name – Your current subscription level (Free, Premium, Custom)
- Status – Shows either "Active until [date]" for active subscriptions or "Expired" with the expiration date
This gives you a quick overview of your subscription status and renewal date.
Financial Data
Shows your billing information with an Edit button on the right side:
- Company Name – The name used for billing and invoices
- Address – Your billing address
- Country – Your billing country
- VAT Number – Your tax identification number for invoicing
Click the Edit button to update your financial information.
Then save your changes.
Financial data is used specifically for billing and invoicing purposes. Keep this information accurate to ensure correct invoice generation and tax compliance.
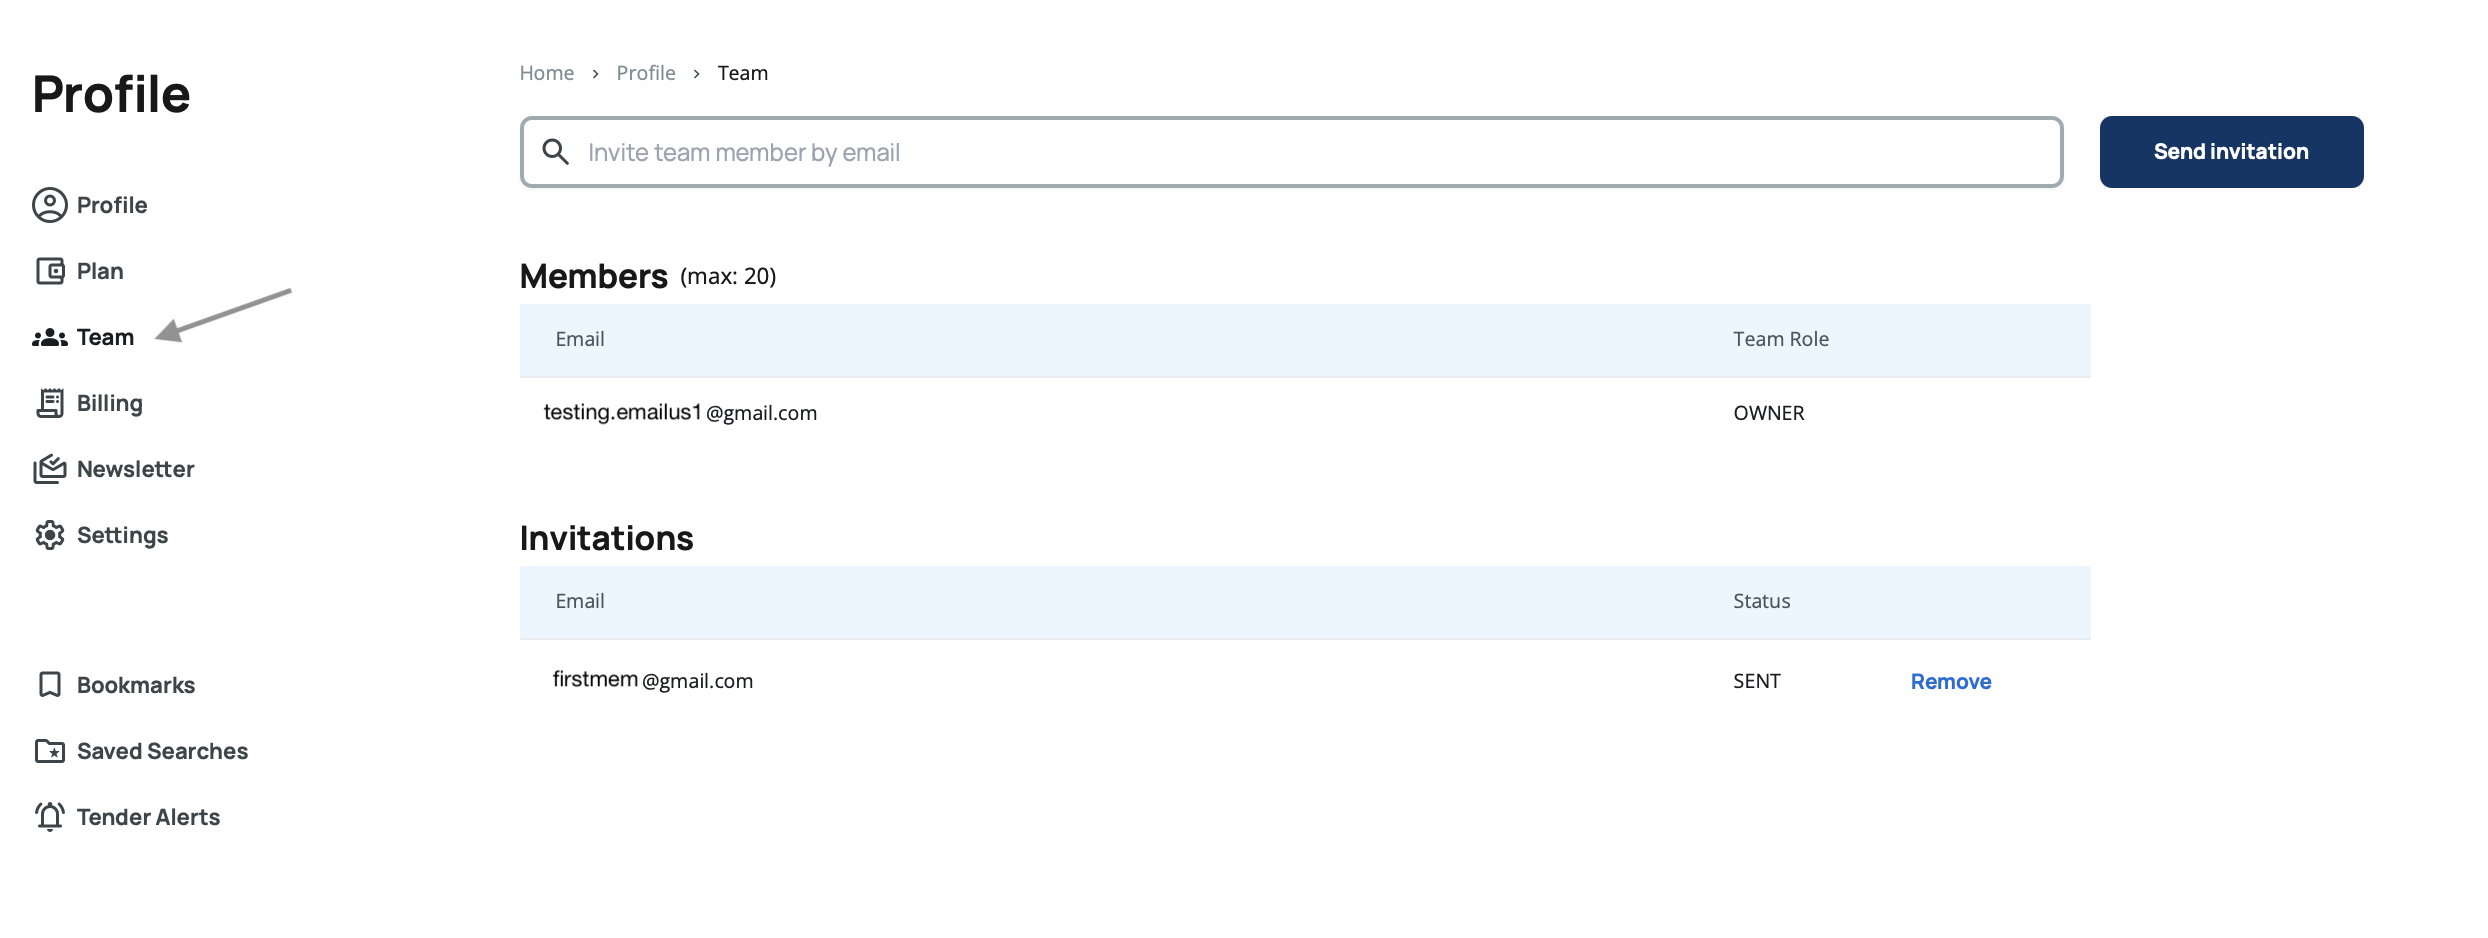
Team
The team section allows you to invite colleagues, manage team members, and track pending invitations.
Invite Team Members
A text input field allows you to enter email addresses of colleagues you want to invite. Type the email address and click the Send button on the right to send an invitation to join your team.
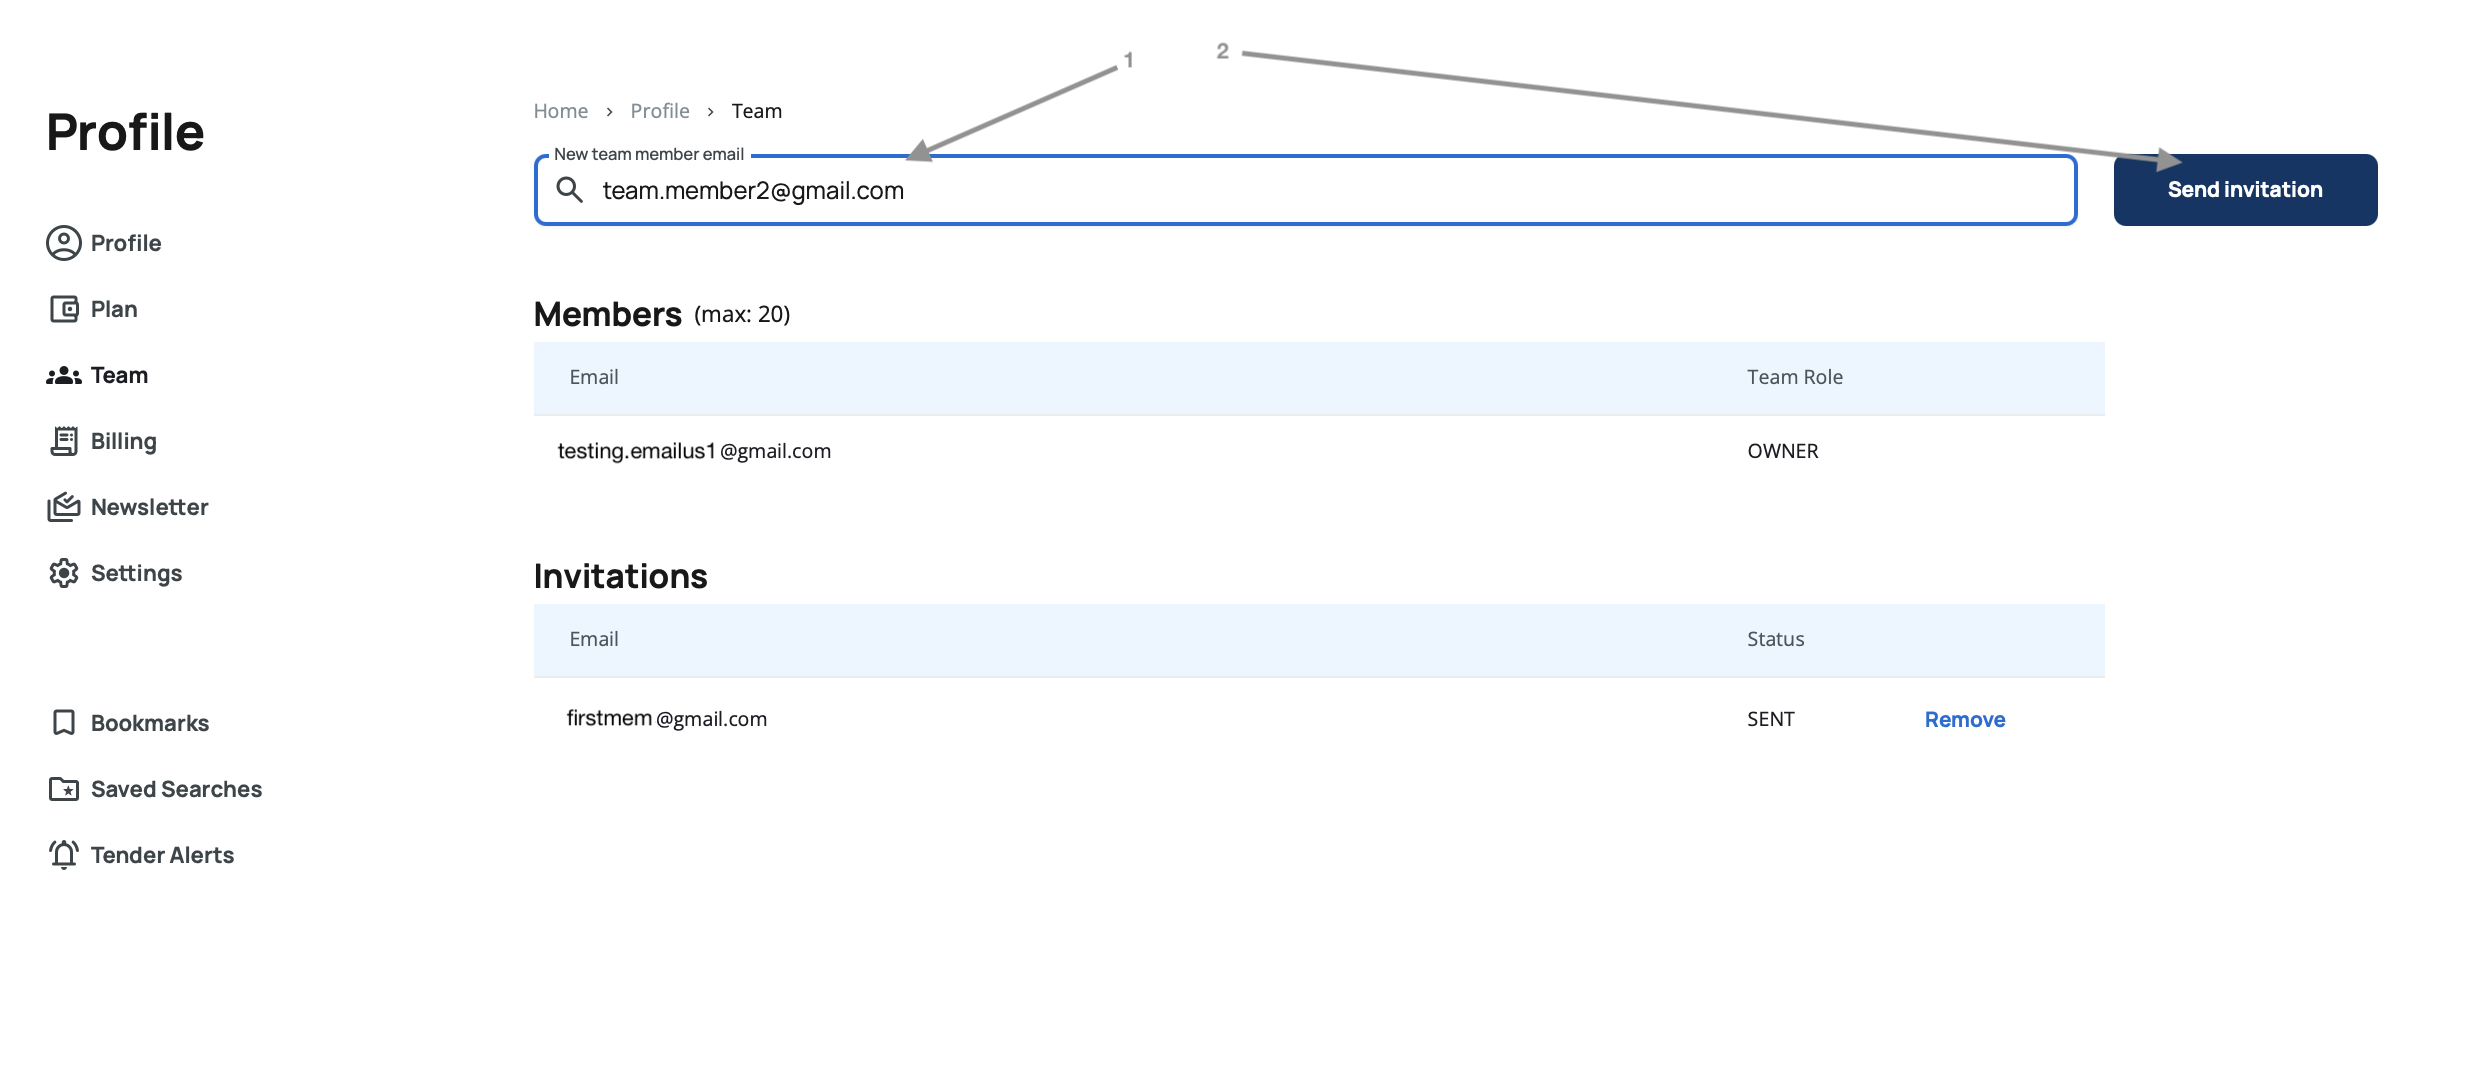
You can invite multiple team members by entering their email addresses one at a time.
Members
A table displays all current team members with two columns:
- Email – The team member's email address
- Role – Either "Owner" or "Team Member"
The owner has full administrative rights, while team members have access based on your plan's permissions.
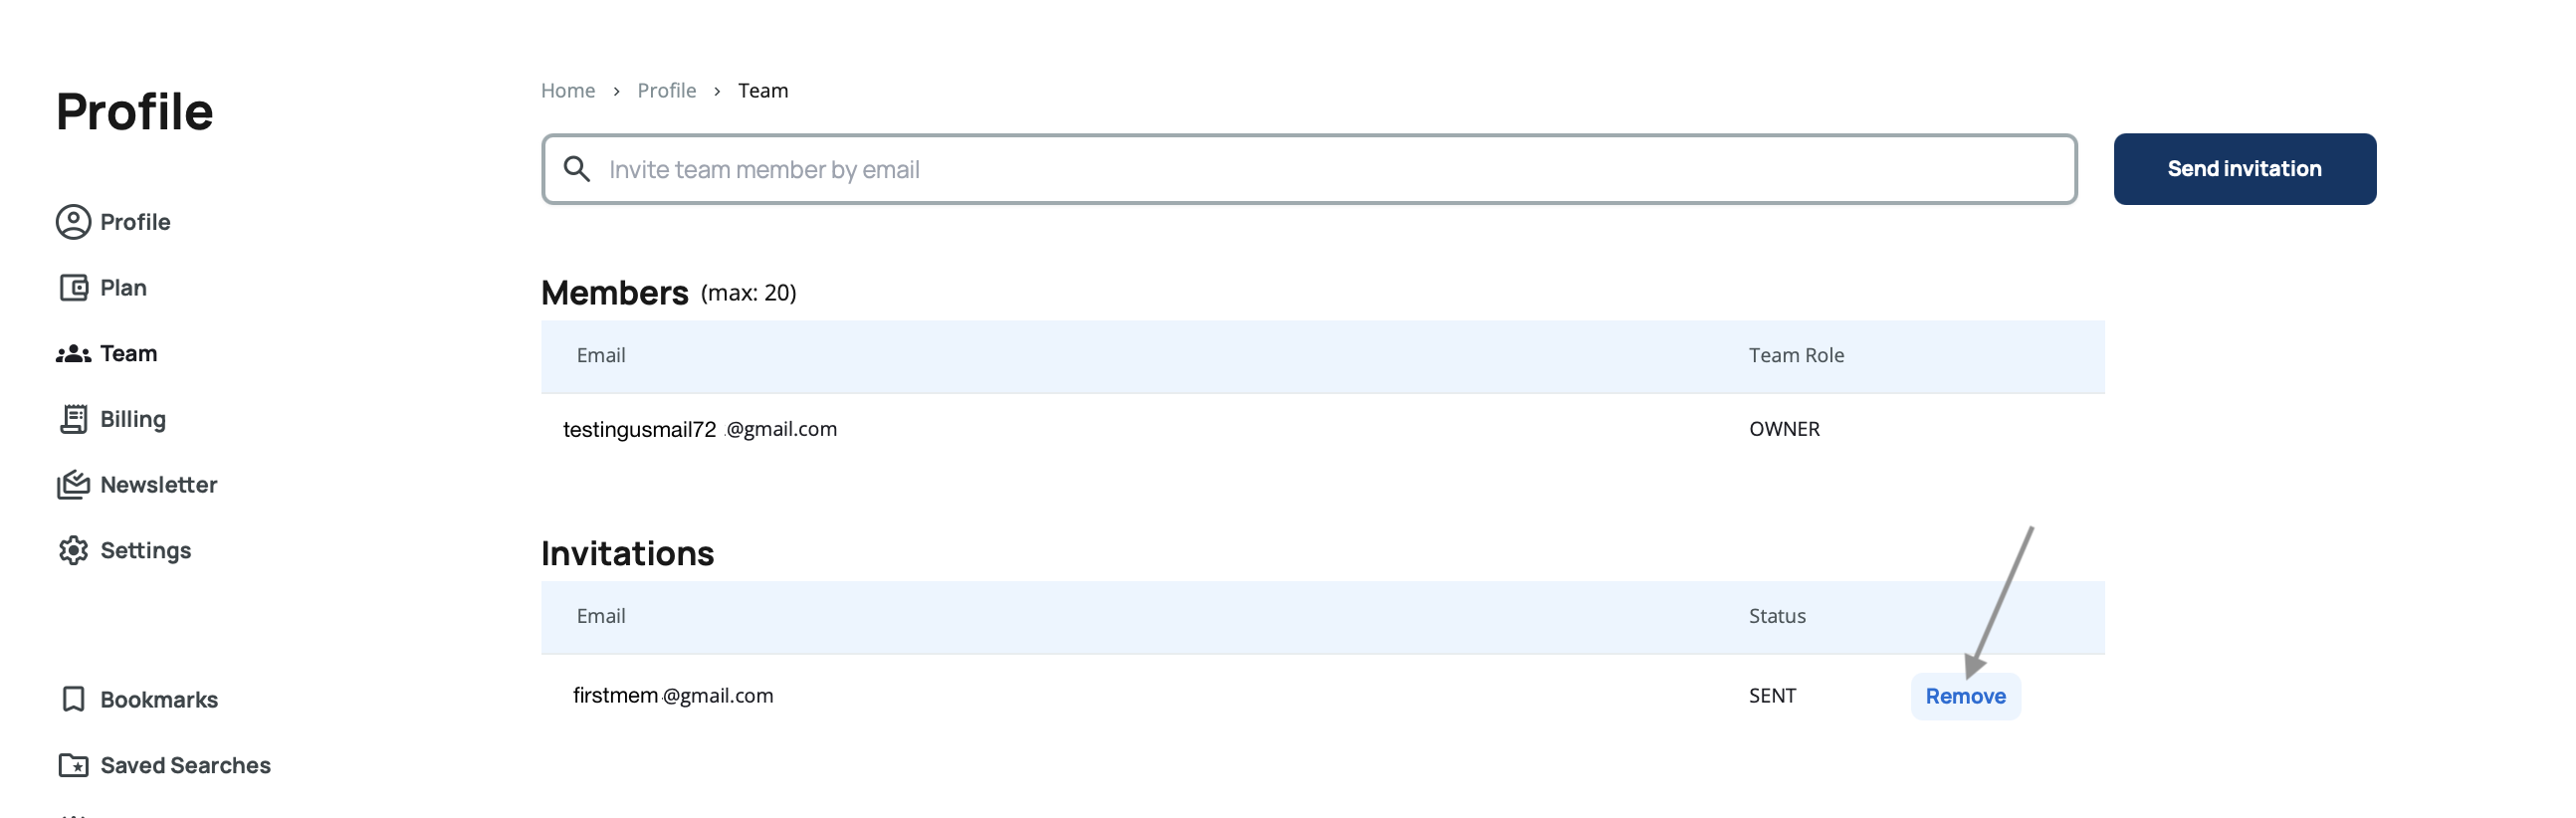
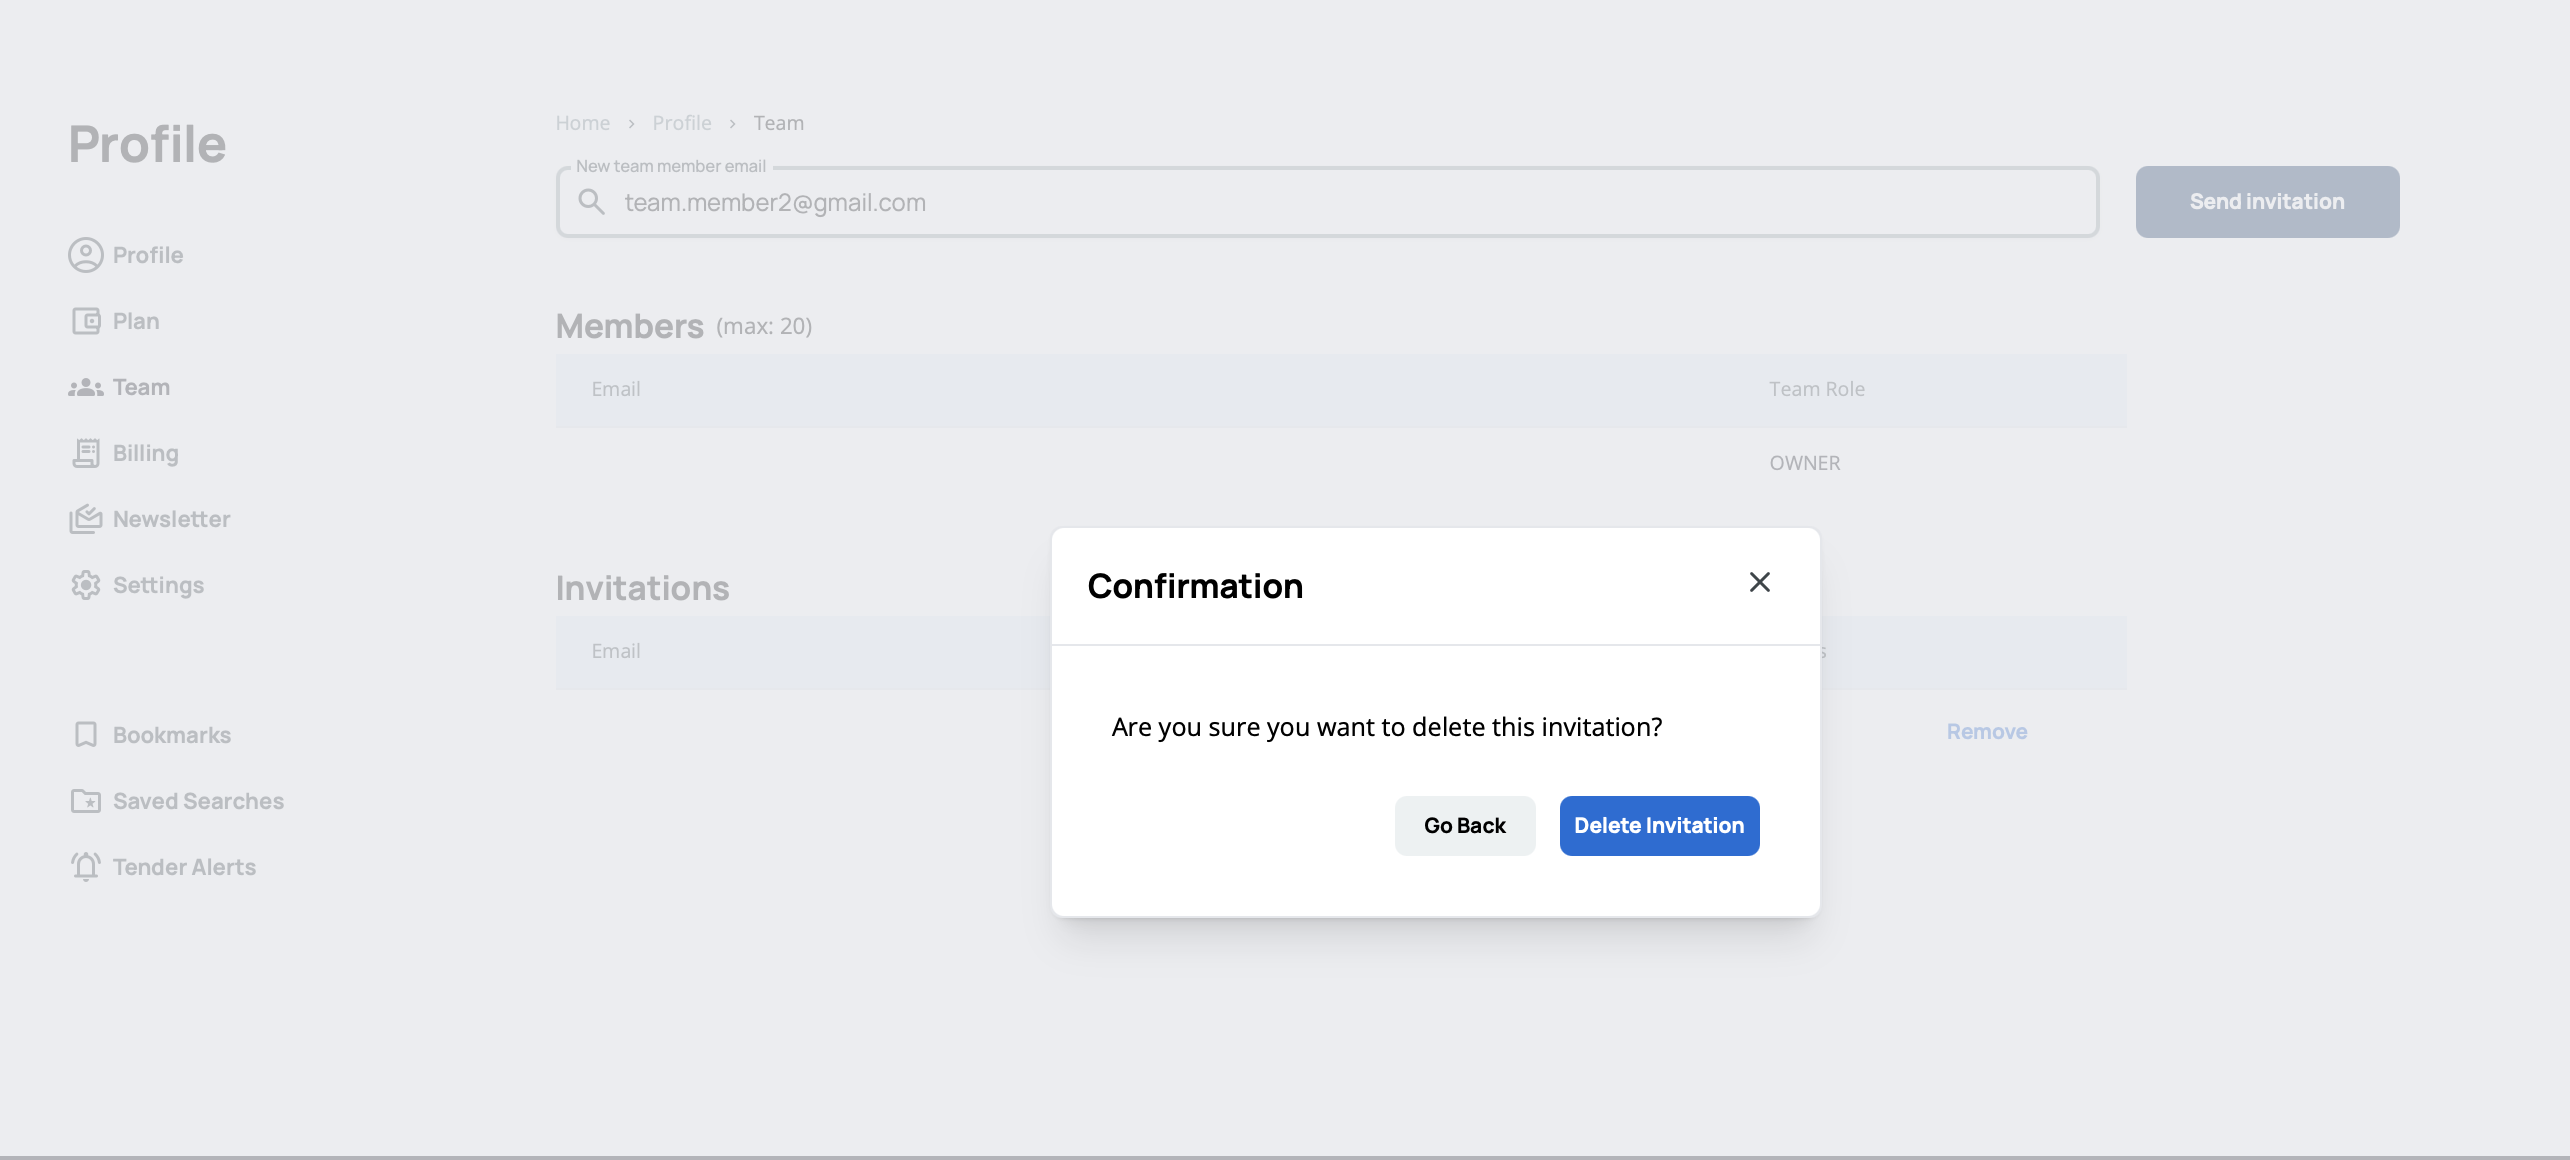
Invitations
A table shows all pending team invitations with three columns:
- Email – The invited person's email address
- Status – Current invitation status (e.g., "SENT")
- Action – A "Remove" option to cancel the invitation
Clicking Remove opens a confirmation popup asking you to confirm the removal of the invitation.
Regularly review your team invitations. If someone hasn't accepted an invitation after several days, consider resending it or confirming their email address is correct.
Billing
The billing section displays your complete invoice history in a table format with five columns:
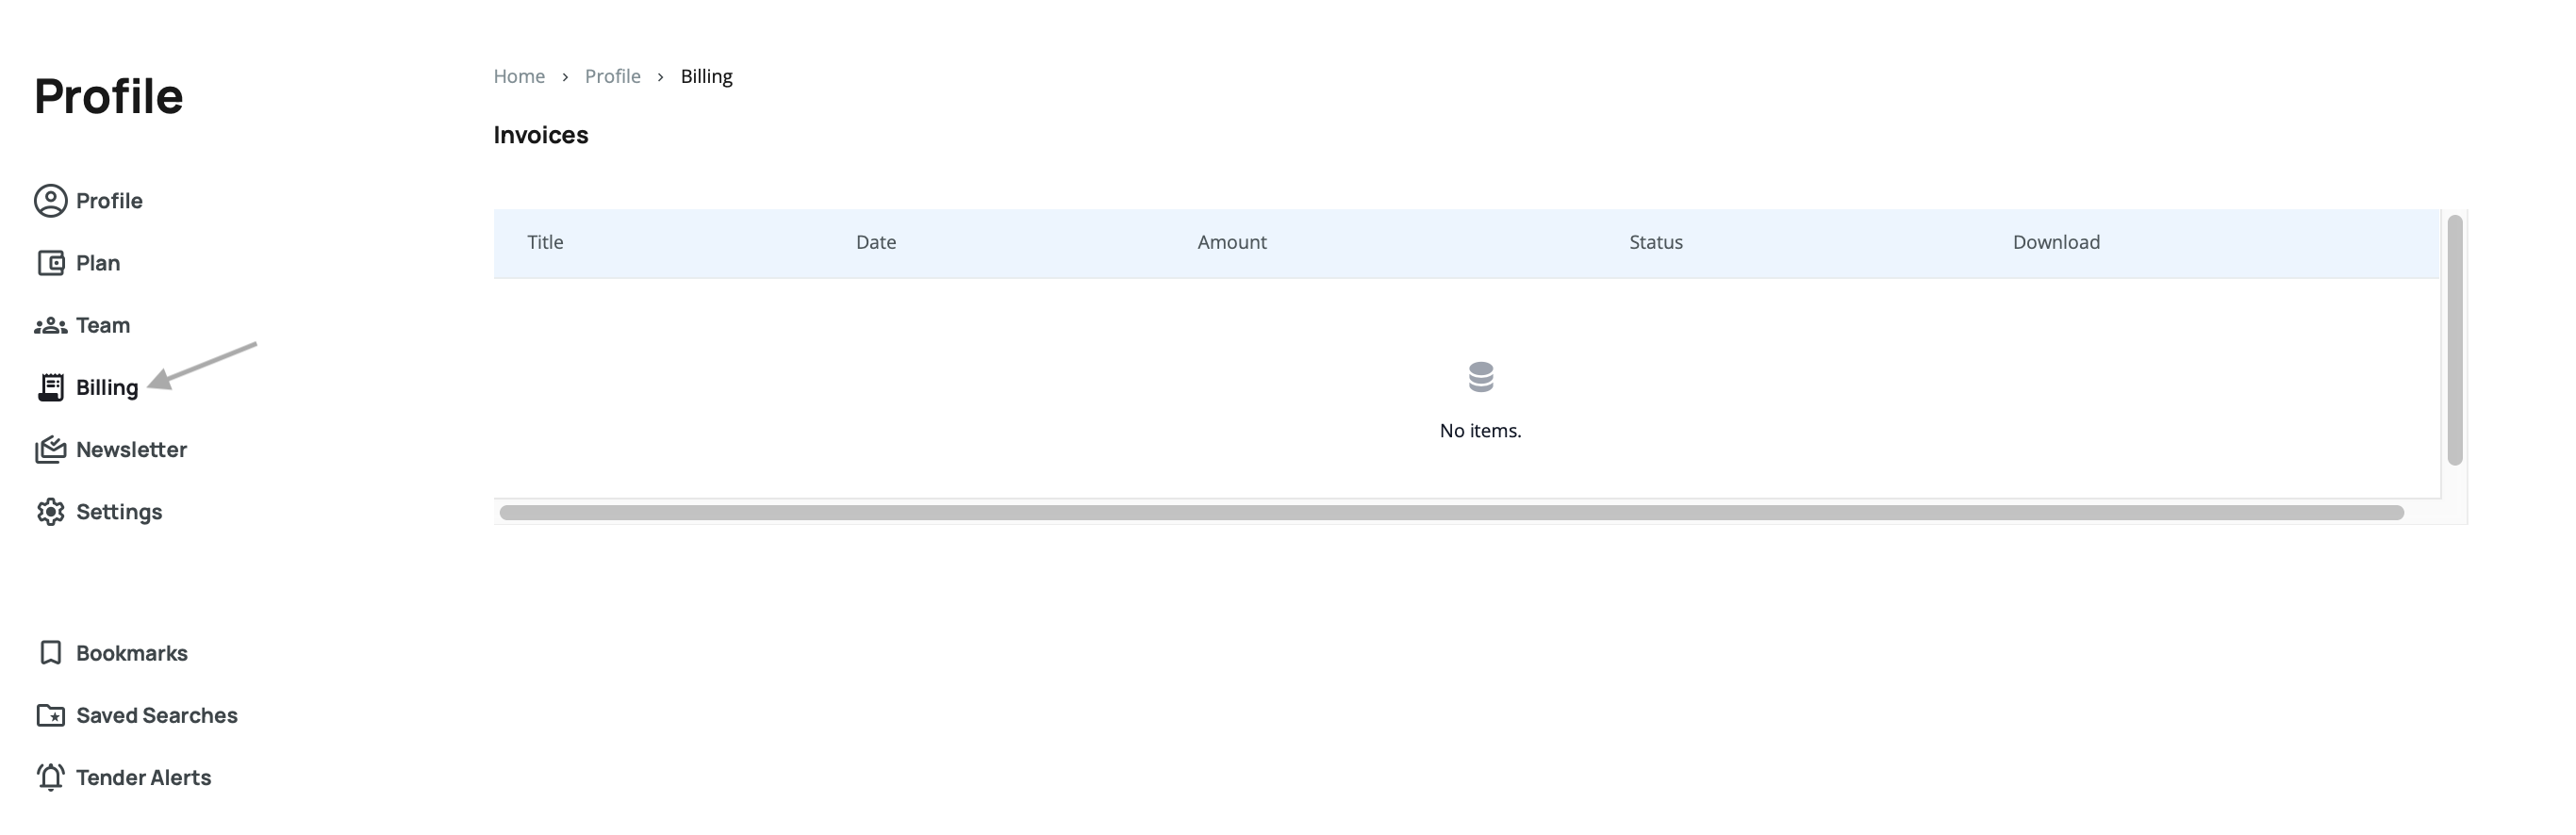
- Title – The invoice description or reference
- Date – When the invoice was issued
- Amount – The invoice total
- Status – Payment status (e.g., Paid, Pending, Overdue)
- Download – A download button to save the invoice as a PDF
Click the download button next to any invoice to save a copy for your records or accounting purposes.
Download and archive your invoices regularly. This makes accounting easier and ensures you have records even if you need them years later.
Newsletter
Manage your email newsletter preferences in this section. You can enable or disable newsletter subscriptions using toggle switches.
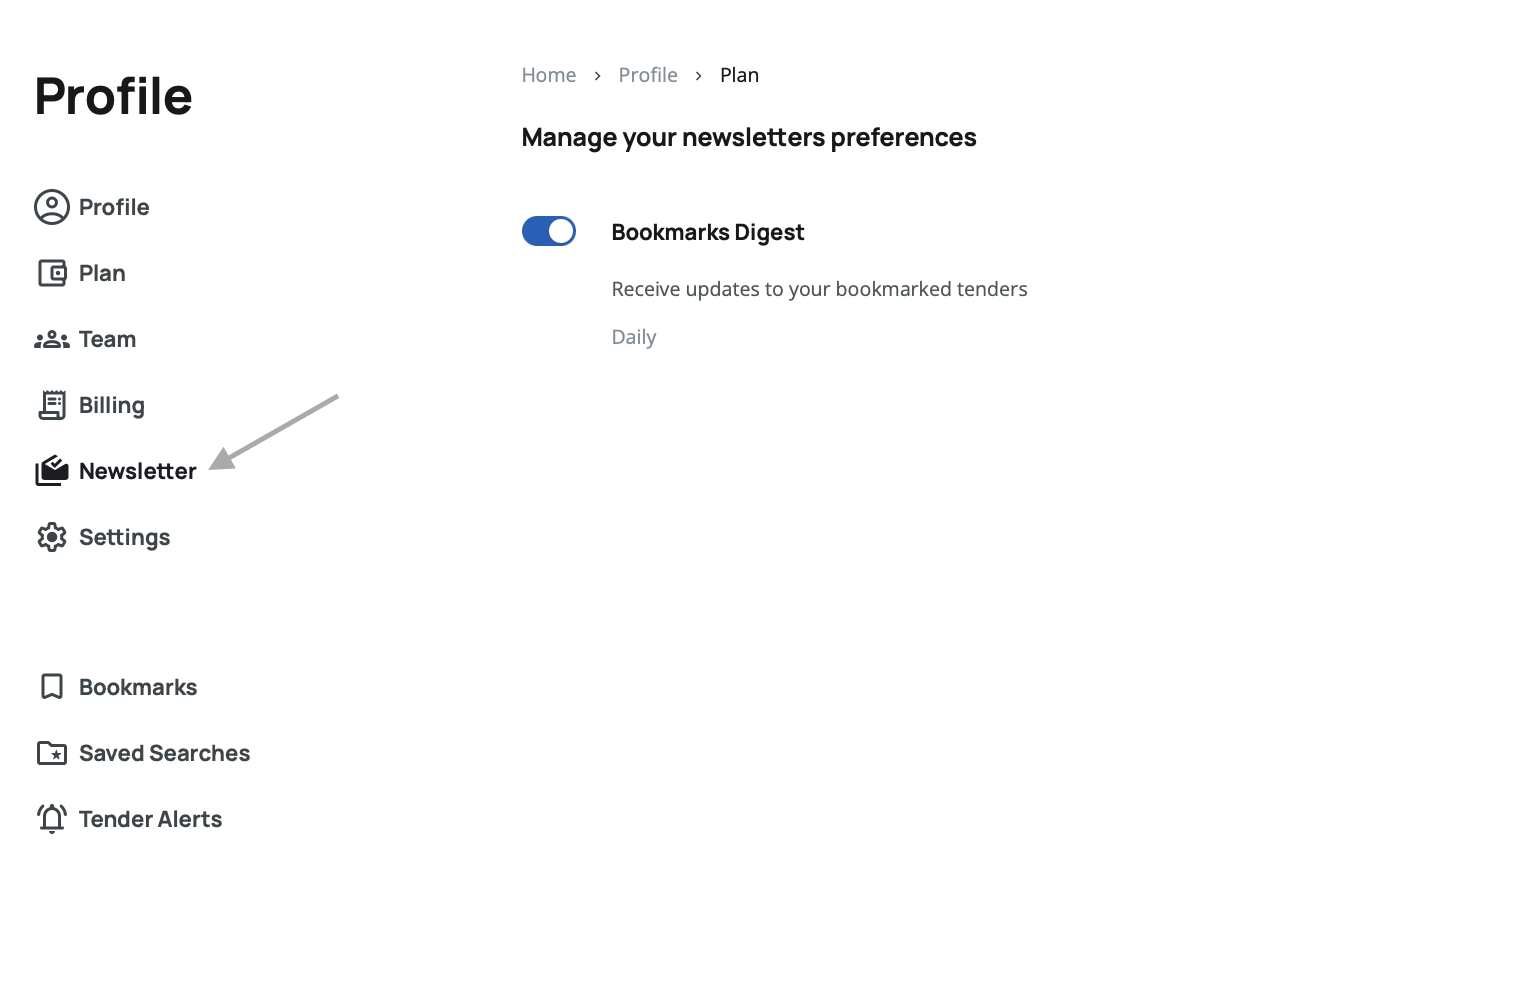
The Bookmarks Digest keeps you informed about updates to your bookmarked tenders, such as deadline extensions, status changes, or new documents.
Set your newsletter frequency based on your workflow. Daily updates work well for active bidding periods, while weekly digests are better for general monitoring.
Settings
The settings section manages your account configuration and security options.
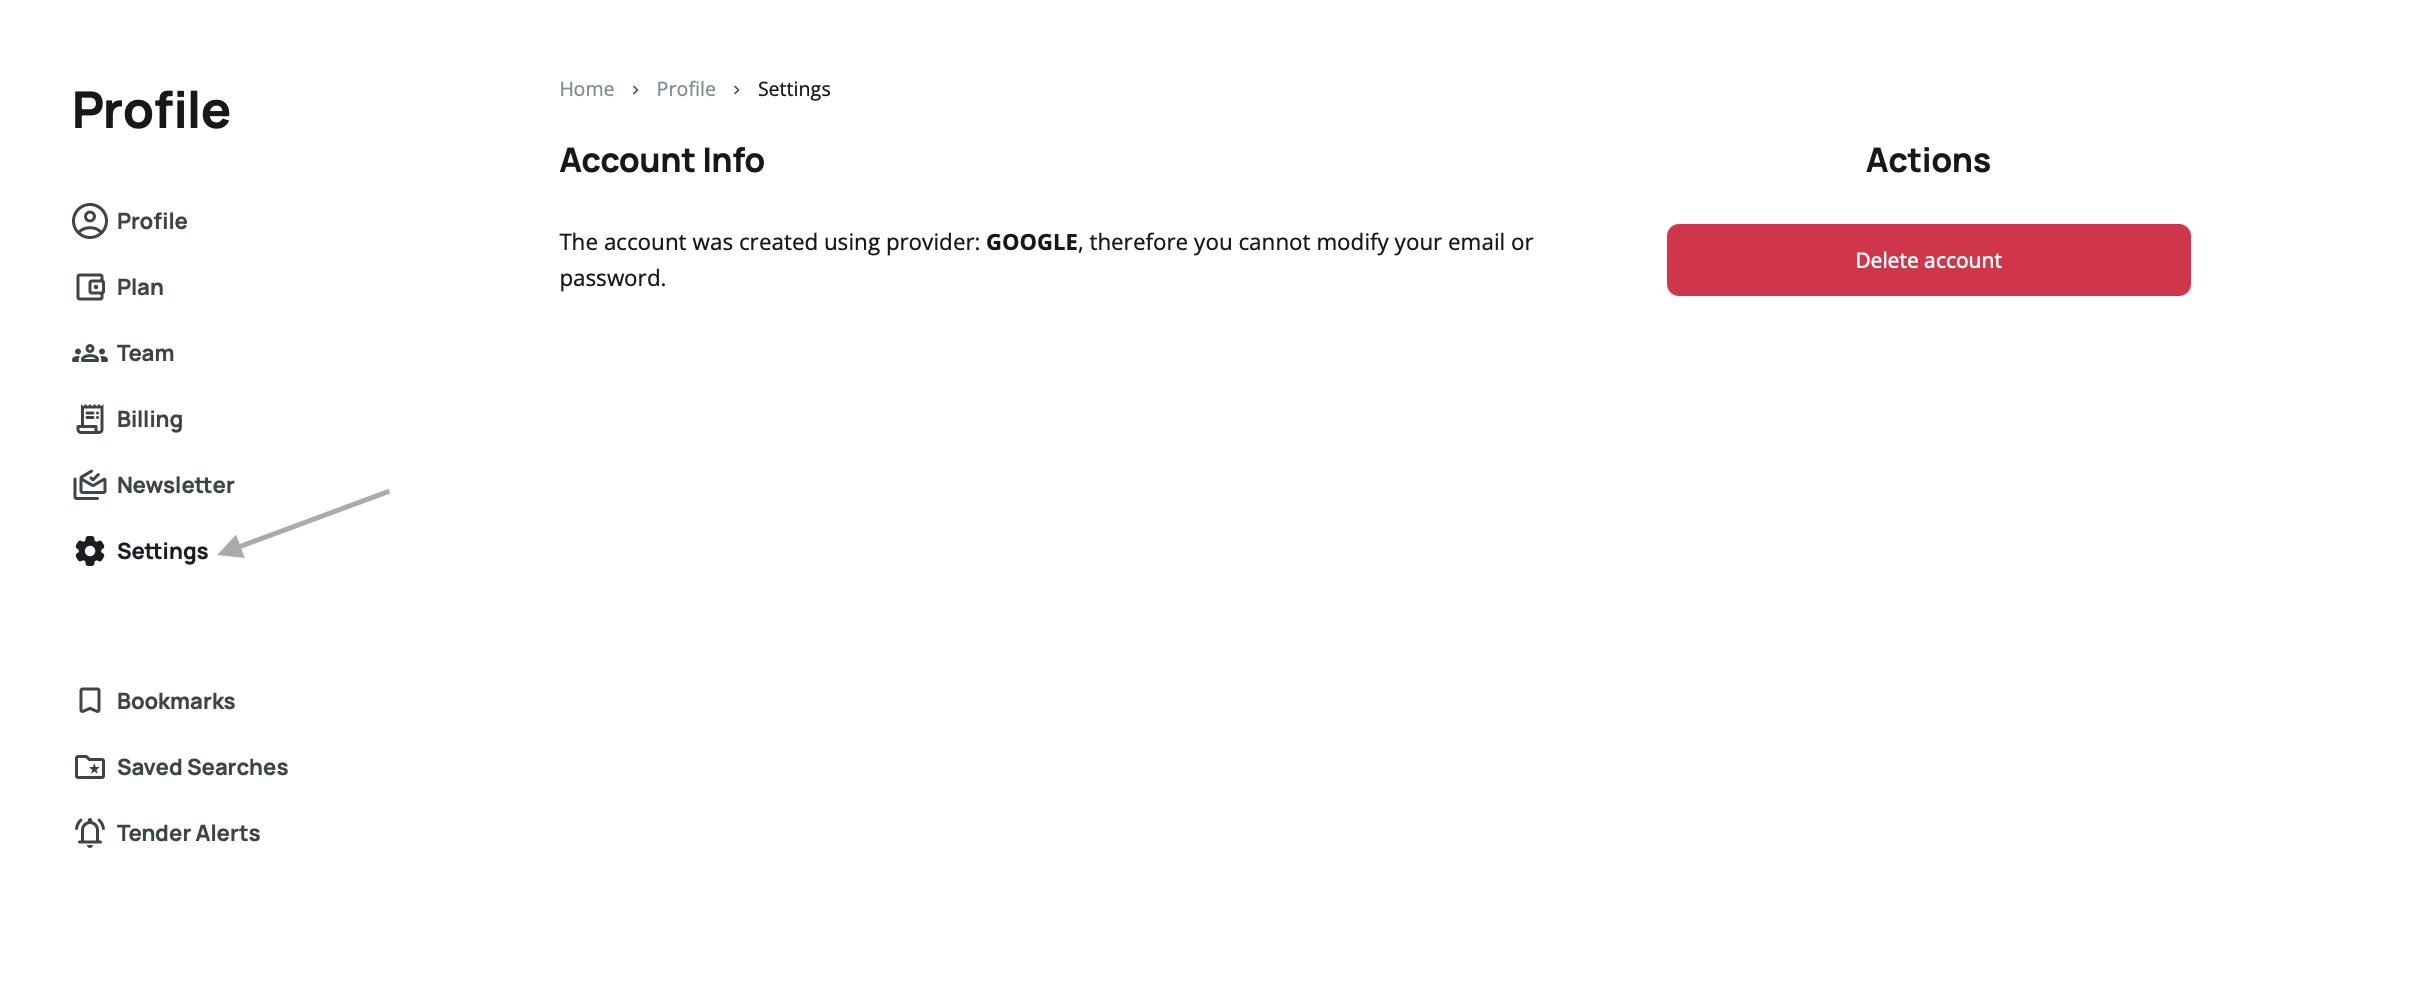
Account Info
Displays information about how your account was created. For example:
"The account was created using provider: GOOGLE, therefore you cannot modify your email or password."
This message appears when you've signed up using a third-party authentication provider like Google, indicating that your email and password are managed through that provider.
Actions
Delete Account – A button to permanently delete your account and all associated data.
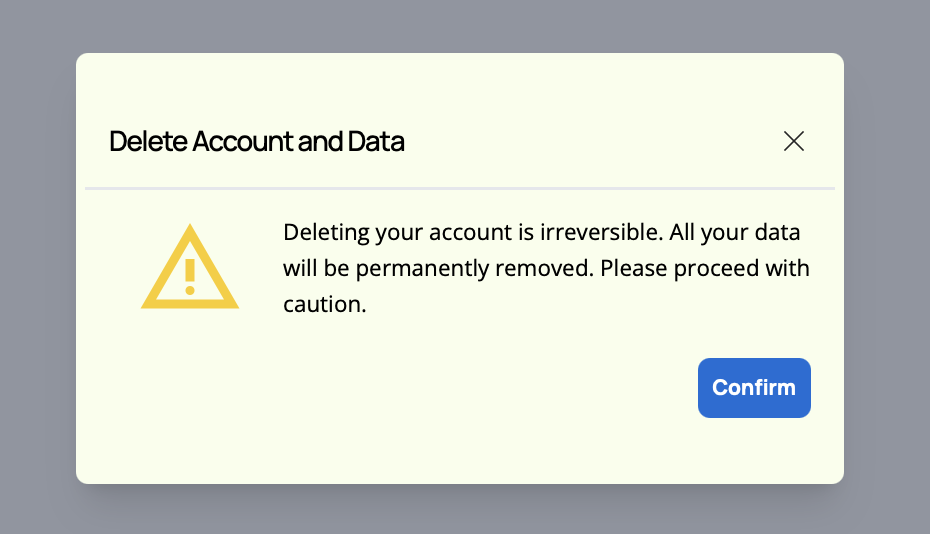
Deleting your account is permanent and cannot be undone. All your data, including bookmarks, saved searches, and tender alerts, will be permanently removed.
Bookmarks
This section displays the same bookmarked tenders list you see in the main Bookmarks section, presented in a table format.

Each bookmarked tender shows key information like title, status, deadline, and publication date. You can remove bookmarks directly from this list using the Remove option on each row.
Unlike the main bookmarks section, removing a bookmark here does not trigger a confirmation popup—the bookmark is removed immediately.
Use this section to review and clean up your bookmarks list. Removing outdated or irrelevant bookmarks helps you stay focused on current opportunities.
For more detailed information about bookmarks functionality, see the Bookmarks section.
Saved Searches
This section displays all your saved searches, identical to the dedicated Saved Searches section. Saved searches let you store filter combinations for quick access, so you don't have to select the same filters repeatedly.
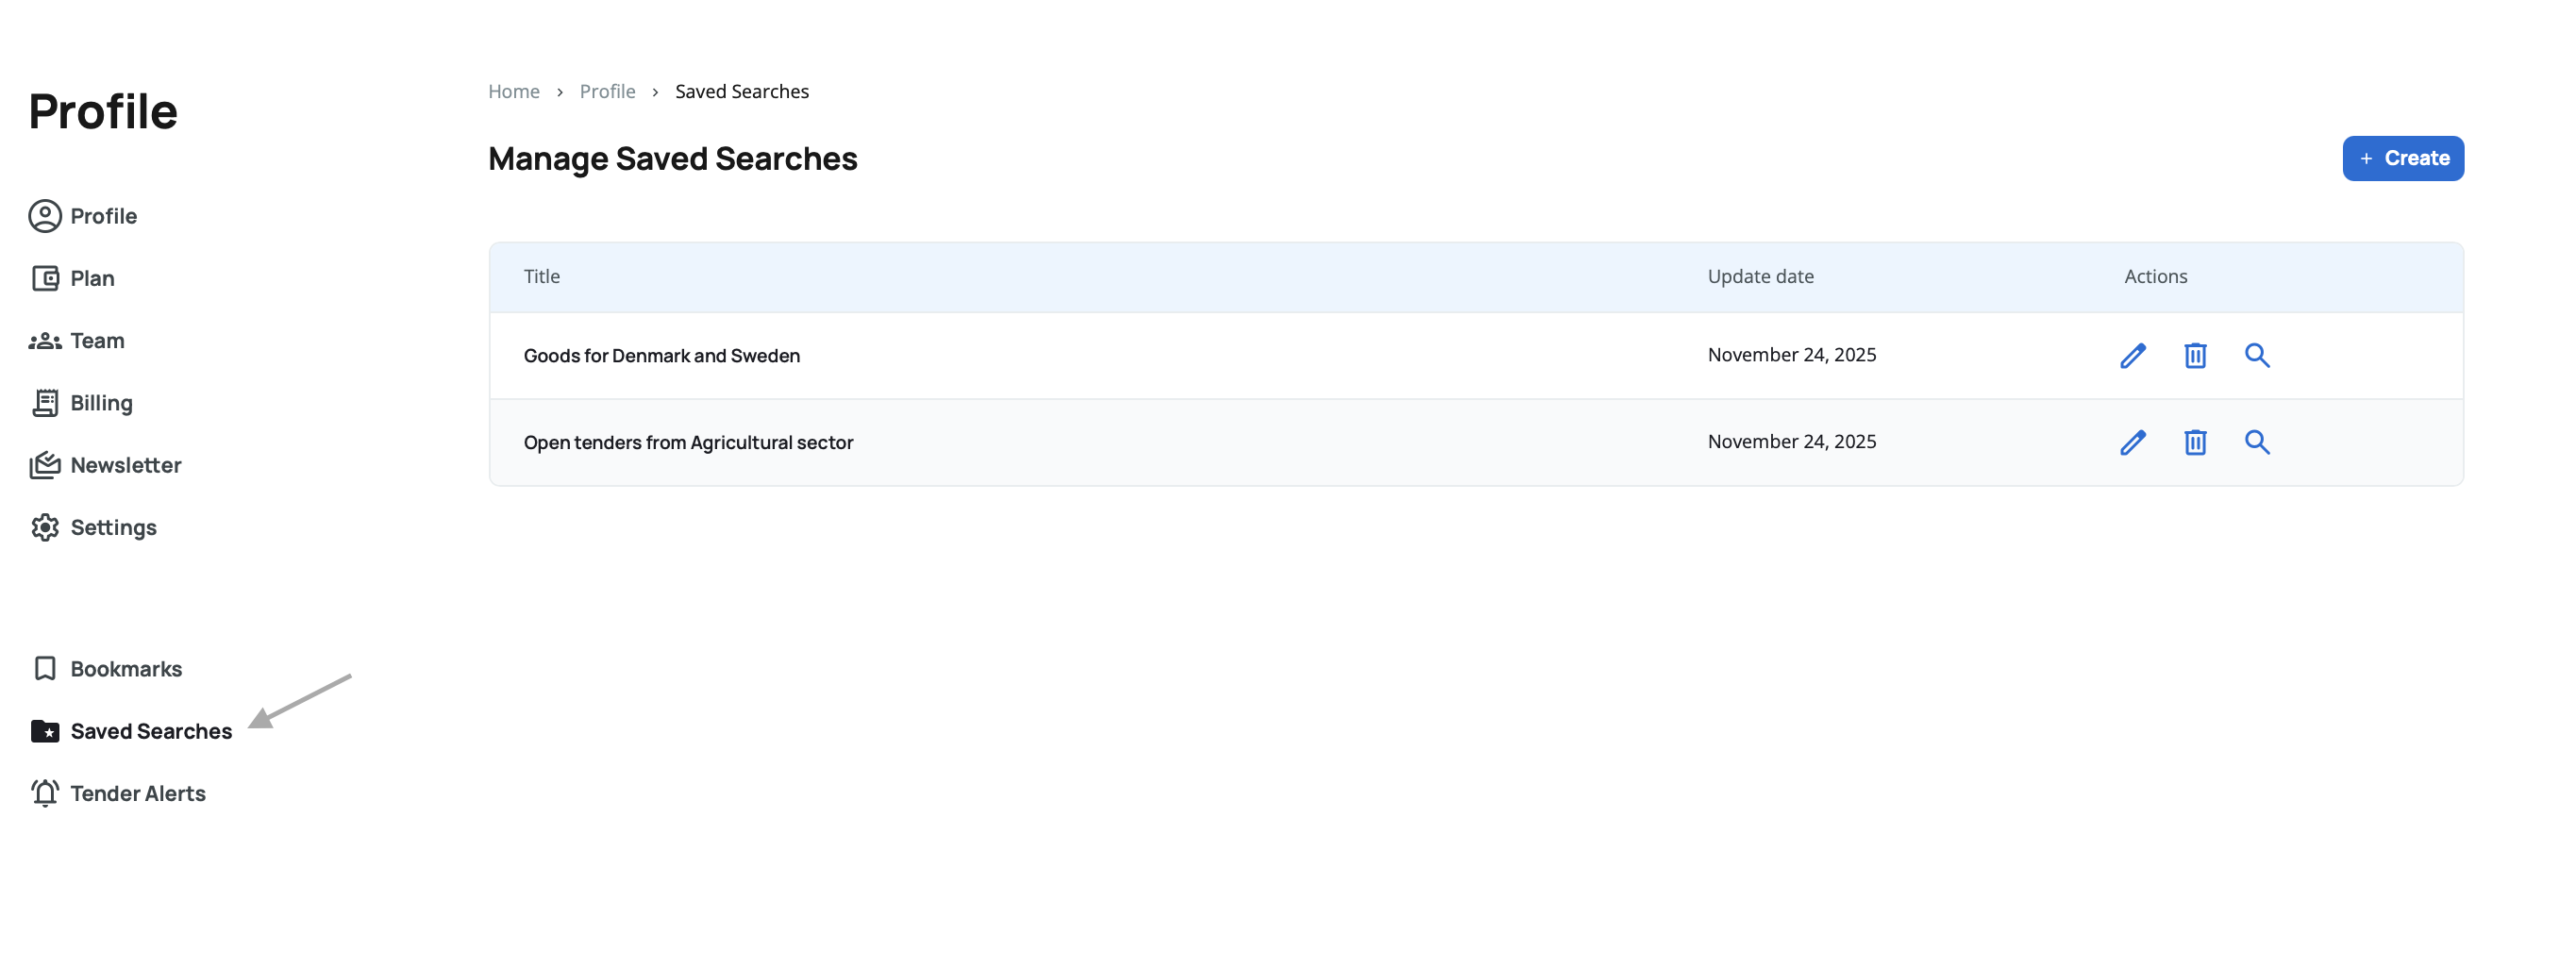
Above the table, you'll find a Create button that allows you to build new saved searches directly from this section without navigating to the separate saved searches page.
Your saved searches are displayed in a table with three columns:
- Title – The name you gave the search when creating it
- Update Date – When the search was last modified
- Actions – Three options: Perform, Edit, and Delete
Managing Your Saved Searches
![]() Create – Located above the table, this button opens a filter pop-up with all fields empty, allowing you to build a new saved search from scratch without leaving your profile.
Create – Located above the table, this button opens a filter pop-up with all fields empty, allowing you to build a new saved search from scratch without leaving your profile.
Each saved search in the table has three action options available:
![]() Perform – Applies the saved filters to the search engine immediately, showing you matching tenders. This is the quickest way to reuse your search criteria.
Perform – Applies the saved filters to the search engine immediately, showing you matching tenders. This is the quickest way to reuse your search criteria.
![]() Edit – Opens a pop-up with all filters and your current selections pre-filled. You can modify any filters (add or remove criteria, adjust date ranges, change sectors or countries) and save the updated search.
Edit – Opens a pop-up with all filters and your current selections pre-filled. You can modify any filters (add or remove criteria, adjust date ranges, change sectors or countries) and save the updated search.
![]() Delete – Removes the saved search from your list. A confirmation pop-up appears before deletion to prevent accidental removal.
Delete – Removes the saved search from your list. A confirmation pop-up appears before deletion to prevent accidental removal.
Regularly review and update your saved searches from your profile. If certain filters no longer match your needs, edit them instead of creating new ones to stay within your saved search limit.
There is a limit to how many searches you can save according to your plan. If you reach this limit, you'll need to delete some saved searches before adding new ones.
For more detailed information about creating and managing saved searches, see the Saved Searches section.
Tender Alerts
This section displays all your configured tender alerts, matching the dedicated Tender Alerts section. Tender alerts automatically notify you via email when new tenders match your search criteria.
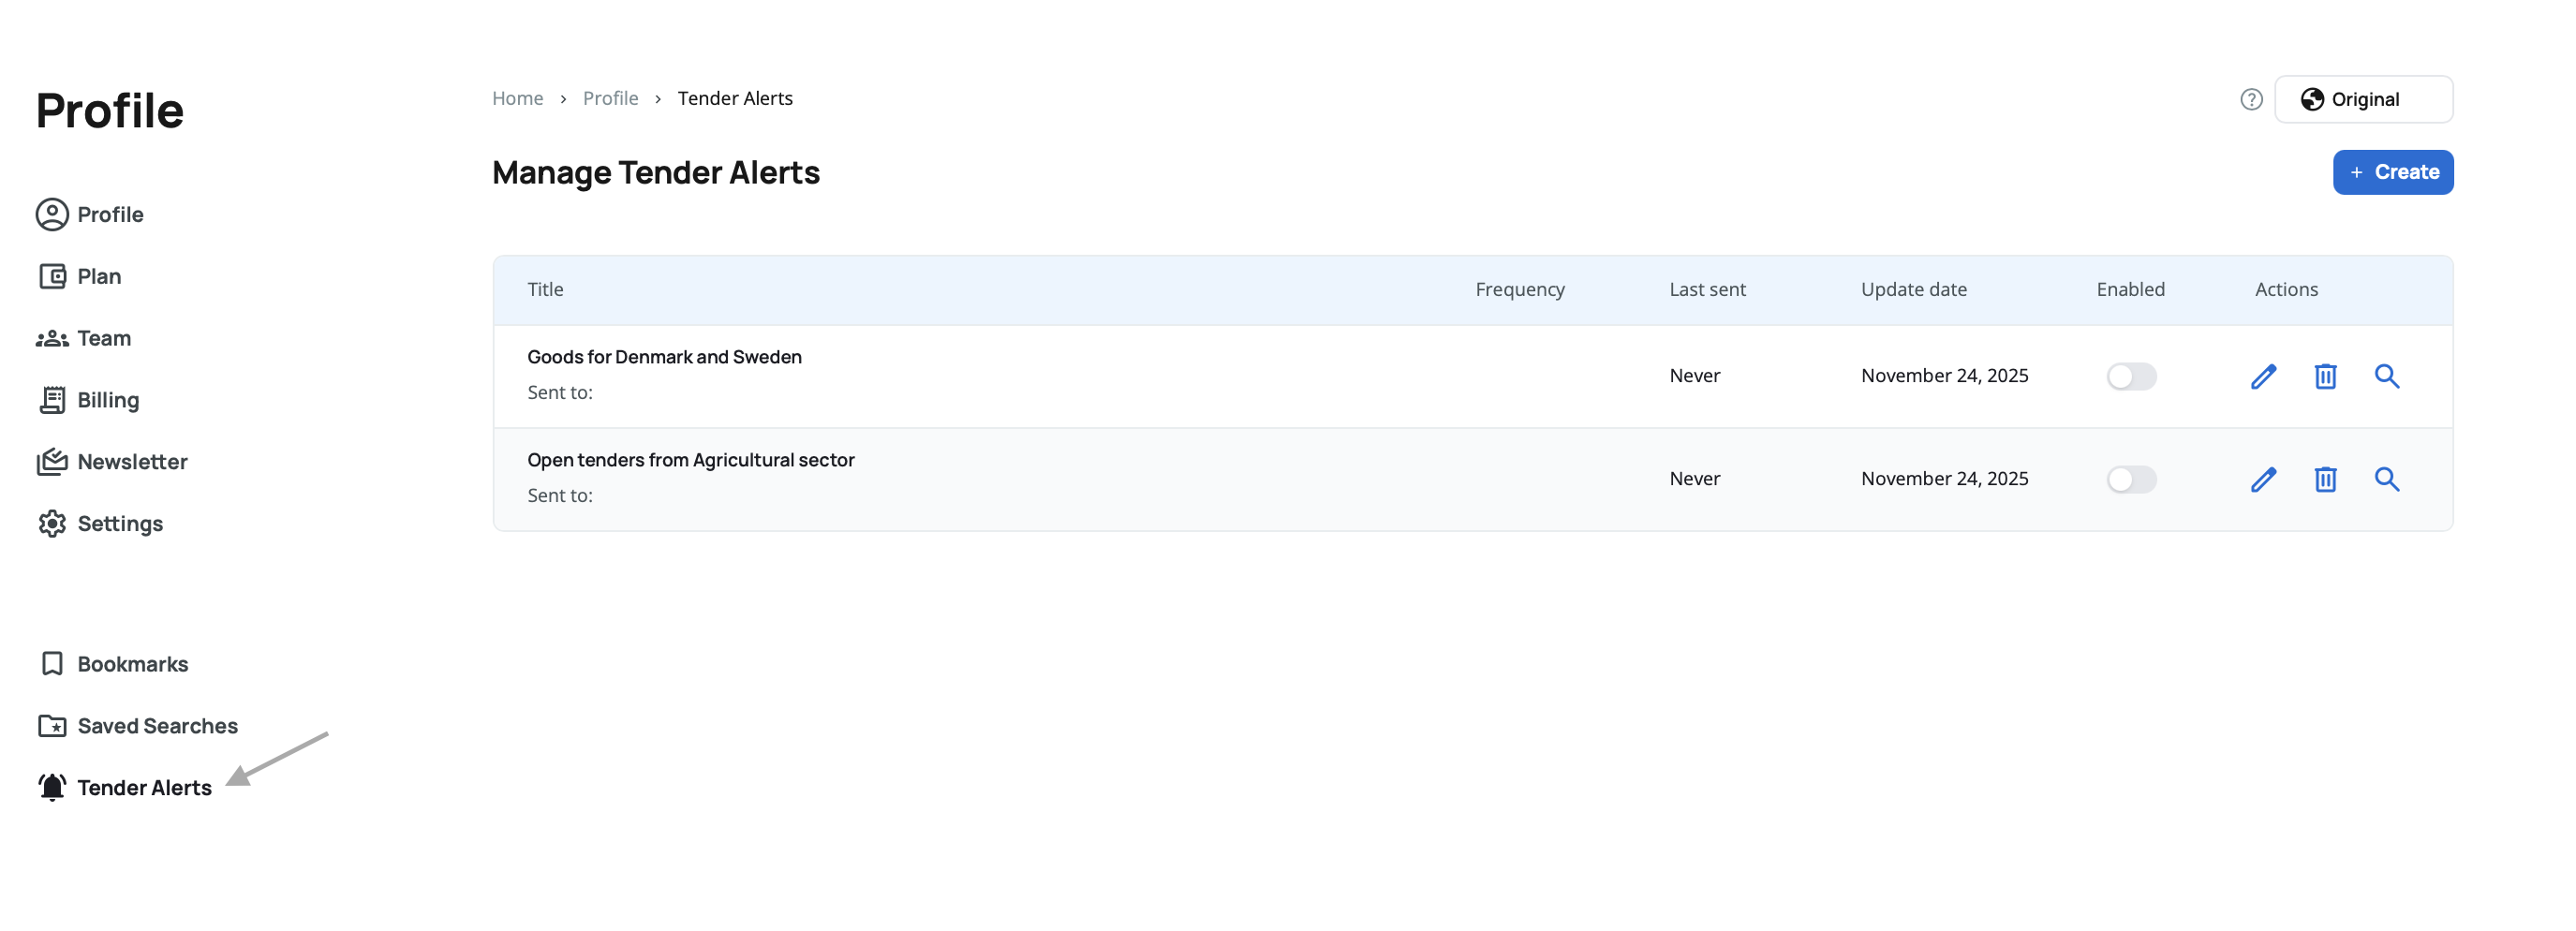
Above the table, you'll find a Create button that allows you to build new tender alerts directly from this section without navigating to the separate tender alerts page.
Your tender alerts are displayed in a table with six columns:
- Title – The name you gave to the alert
- Frequency – How often the alert sends email notifications (Daily, Weekly, Twice a week, Monthly)
- Last Sent – When the alert last sent an email notification
- Update Date – When the alert was last modified
- Enabled – A toggle switch to quickly enable or disable the alert
- Actions – Three options: Perform, Edit, and Delete
Managing Your Tender Alerts
![]() Create – Located above the table, this button opens a filter pop-up with all fields empty, allowing you to build a new tender alert from scratch without leaving your profile. You can configure the title, frequency, recipients, and filter criteria.
Create – Located above the table, this button opens a filter pop-up with all fields empty, allowing you to build a new tender alert from scratch without leaving your profile. You can configure the title, frequency, recipients, and filter criteria.
Each tender alert in the table has three action options available:
![]() Perform – Applies the alert's saved filters to the search engine immediately, showing you matching tenders without waiting for the next email. This helps you verify your alert criteria.
Perform – Applies the alert's saved filters to the search engine immediately, showing you matching tenders without waiting for the next email. This helps you verify your alert criteria.
![]() Edit – Opens a pop-up with all filters and your current selections pre-filled. You can modify filters, change the frequency, update recipients, or adjust the alert title.
Edit – Opens a pop-up with all filters and your current selections pre-filled. You can modify filters, change the frequency, update recipients, or adjust the alert title.
![]() Delete – Removes the alert from your list. A confirmation pop-up appears before deletion to prevent accidental removal.
Delete – Removes the alert from your list. A confirmation pop-up appears before deletion to prevent accidental removal.
Enabling and Disabling Alerts
Each alert has a toggle switch in the Enabled column. When an alert is disabled, it stops sending email notifications but remains in your list with all settings preserved. You can re-enable it anytime by clicking the toggle.
Use the enable/disable toggle when you temporarily don't need certain alerts. This is perfect for seasonal businesses or when you're taking a break from bidding on specific tender types.
Review your tender alerts periodically from your profile. Disable alerts for completed projects or markets you're no longer pursuing to reduce email clutter and keep notifications relevant.
There is a limit to how many alerts you can create according to your plan. If you reach this limit, you'll need to delete some alerts before adding new ones.
For more detailed information about creating and managing tender alerts, see the Tender Alerts section.